Wednesday, October 31, 2012

Halloween Party 3

 
Happy Halloween!!! The day has finally come and while Halloween was wonderful this year, I am already feeling more relaxed. Today was the final Halloween party. We invited five of K's friends that he goes to a "mommy and me" playgroup with. All of the boys are in the same grade, but K is the oldest. The youngest just turned two this past weekend, so they are all within six months of each other. I thought it would be mental with six moms and six two-year old boys, but it ended up being really nice. K had an absolute ball!
 
For this party, I made puffed rice treats to look like Jack-o-lanterns. They ended up really cute. I used this recipe from the "Rice Krispies" website, but did a few things (most things??) differently. The first is that I didn't use Rice Krispies - yet another thing I can't seem to find here. I imagine we have them some place, but I just couldn't seem to figure out where. We do, however, have sweetened puffed rice that is often given to kids as a snack. I was afraid it might melt under the melted marshmallows, so I did a trial run on the weekend and they turned out just fine. 
 
 
The other changes I made were leaving the chocolates out - a lot of the kids have yet to eat chocolate, poor babies. We also don't have gum drops, so I used little snacks that are a long cracker-like stick filled with chocolate cream. Finally, I had some buttercream left over from the cupcakes I made last week, so I dyed some of it black and piped on little faces. I originally wanted to do them all different and make a few of them funny, but they were so tiny and working on an uneven surface proved to be a bit of a challenge. Some are definitely cuter than others.
 
 
The other treats I "made" were marshmallow ghosts. I didn't really make them; I just drew little faces on them and stuck them on sticks. They were pretty cute though and the kids ate them up!
 
 
I also made little felt bags for the boys to take goodies home. I got three 40cm X 40cm pieces of orange felt and two of green felt, cut the orange ones in half and sewed up the sides. I added a few details in green and also made the handles green. I then cut out a set of eyes and a mouth from a scrap piece of black felt for each bag and attached them to each bag with a nametag. The kids put the faces on at the party. I felt like a factory pumping these bags out. It was surprisingly fast to make all of them, but doing six of anything at the same time makes it feel like ages.


K put the mouth and eyes on by himself - he nailed the placement, but the eyes in different directions, yikes.
 
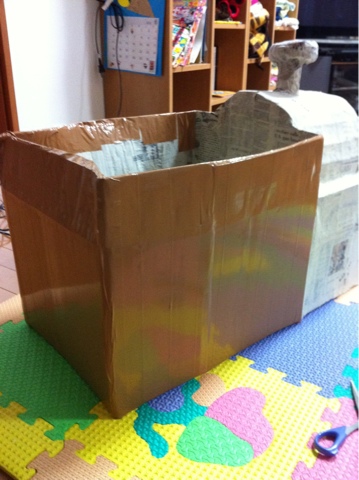
Finally, I decorated our front door to look like a monster. I did this for the last party as well and K LOVED it! He loves coming home and being greeted by the monster. For a while, his hair had fallen off and K was none too pleased. I put it back on while he was napping, so when we greeted our guests, K had a surprise as well. He was so happy! 
 
One of the other moms drew Jack-o-lantern faces on mandarin oranges; so we had a bowl of tiny Jack-o-lanterns as well - so cute!
 
 
K ended up taking them out of the bowl and used a bulldozer to move them around. It cracked me up.


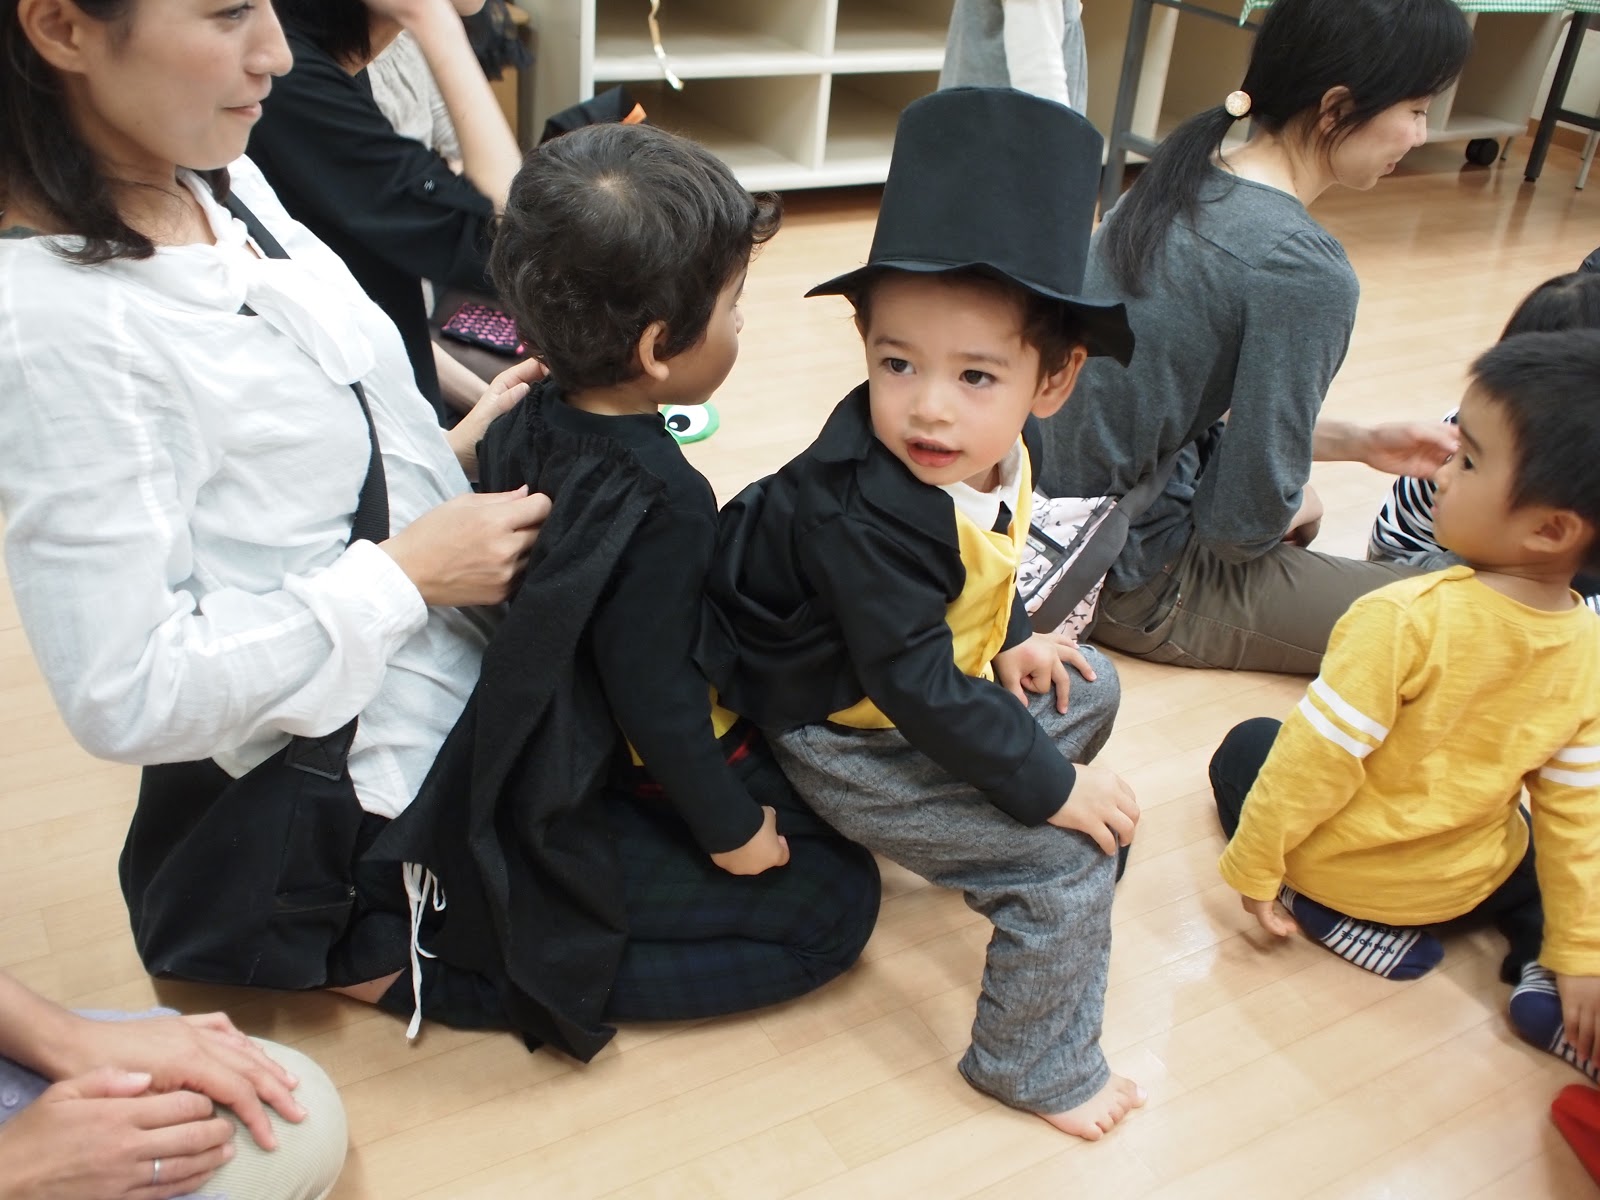
He had such a fun time with his friends. They played trains and cars and jumped on the mattress in his room. One of the boys has a little sister who is four months old. K adores her. He was so stoked that she was here, too. He talked to her a lot and kept trying to get her to hold his toy trains. She had little interest, but kept babbling on to him so he was pleased. 


At the end of the day, just before going to bed I always ask him what his favorite party of the day was. Today he said, "playing with my friends." My heart melted. I hope he always has this much fun with his friends.


HAPPY HALLOWEEN!

Tuesday, October 30, 2012

K's "Big Thomas"


Last Wednesday when I decided I would make K a Thomas to go with his costume, I was envisioning it being a simple task - tape some cardboard together, paper mache it (just as I'd done for his pinata), and paint. But, rarely ever does a project go as planned.

Things started out well. I got the boxes taped together just as K was waking from a nap. He saw it and knew it was Thomas straight away. He spent the next hour or so waking around inside Thomas. I was worried he'd ruin it, as it was just a weak cardboard structure, so I made him stop with the promise that he could use it again soon. That night, after he was asleep, it was time to get paper mache-ing.


The paper mache bit went really well, everything was still going along swimmingly.


I wanted to make sure that Thomas was dry by morning, so I put him in our shower with the drying mode turned on and went to bed knowing that I was way ahead of the game! It was only Wednesday night and all I had left was to paint.

I woke up Thursday morning to find this:

 
A bowed box that was supposed to be Thomas. Gaaaa!!! I called my parents for advice on how to fix it. My mom suggested getting a new box and just covering it with duct tape and my dad suggested getting really thin wood and starting over. Yeah, that wasn't going to happen. I had used all of the boxes we had on hand, so I seriously had to think of something. Finally, I remembered that the grocery store has boxes you can take for free. Yay for our local grocery store! I grabbed a few boxes and then some duct tape from the 100 yen store. That night, I got to covering and taping.


Although the inside is (obviously) just as bowed as the outside, I didn't have it in me to cover the inside as well. So, only the outside is flat. And even that isn't perfect.


After all of that, I worked out that the blue paint wouldn't cover the brown tape very well. Crisis #2. After painting the front face part, I had to stop for the night since I was beat and all of the shops were closed. Also, I had to think up with a new strategy. The next day Y had the day off, so while K was napping I ran off to the 100 yen shop to come up with a plan. While I did that, I had Y cut holes into the top so K could carry Thomas easily.
 
 
I ended up buying black and white duct tape (they didn't have any blue) and figured I could just paint the white as necessary. I ended up sending Y back to get some red since tape is a heck of a lot faster to deal with than paint. Thomas got a second layer of duct tape and then a coating paint. I had to put some white tape in the bottom black area so that I could paint on some wheels. 
 
 
By Friday night, Thomas was all painted and ready for Saturday's party. Phew! We kept Thomas hidden from K until it was time to go to the party. When we brought it out, K had the biggest smile on his face and just said, "Thomas!" When he gets overwhelmed, he tends to get really quiet. He really didn't say much, he just looked at it and asked to get in. As I mentioned in yesterday's post he hardly got out of Thomas the for entire party. He just sat in it, proud as could be.
 
 
After waking from his nap, he spent the entire evening playing with the "big Thomas." It was time for dinner and he refused to sit in his seat. He brought Thomas over next to my chair and made me feed him while he sat on a pillow that we placed in Thomas so he wouldn't have to stand the whole time.
 
He is still smitten with Thomas and to be honest, I'm stoked. Making him was a bit more involved than I had anticipated and I would have been pretty bummed if K wouldn't have had any interest in him. We are having the final Halloween party tomorrow. All of the boys coming really like Thomas. As lame as this is, I think I am going to put Thomas away during the party. K is really quite good at sharing his toys, but I imagine this would be off limits. 

Monday, October 29, 2012

Halloween Party 2

 
As I mentioned in Friday's post, on Saturday we headed to the kids' community center in the neighborhood and joined in the Halloween party. The people that came to our house for the party last week, as well as those who will come this week, are K's good friends. They know he loves Thomas the Tank Engine, also they all have boys, so they know who Sir Topham Hatt is. For the party at the community center, however, there would be a lot of people who likely would not know who Sir Topham Hatt is. Seeing him next to a Thomas, however, I thought people might make the connection. So I made K a huge Thomas out of cardboard, paper mache, more cardboard, duct tape and paint. I'll post tomorrow (hopefully) with some photos of the Thomas making process, trust me it was a process!
 

We left the house in time to get to the park for the parade to the community center. I had Y hold Thomas and K wanted to be held as well. Soon after I took this photo, Thomas got bashed into one of those wooden columns; I took over holding Thomas from there ;) As we were walking a car drove by and one of the little boys in it yelled out, "There's Thomas!!!!" It was adorable and after all the time and effort it took to make, it totally made my morning.
 

We got to the party and Thomas was a huge hit. All of the boys, and a few girls, kept coming over to touch him or just look in awe at him. Seriously, it was so cute. K was so proud and hardly ever got out of Thomas. He just sat in it, chillin'.


When he did finally get out, he of course went to go sit with/on his best friend, Batman.


At the party, we sang songs and watched magic. Then the kiddies just ran around and played in their costumes while the parents took tons and tons of photos.


 Before leaving, Sir Topham Hatt had to do a bit of cleaning.


On the way home, we stopped at the "Eco Flea Market" that was going on that same morning and afternoon. One of my best friends here had a little shop. She is wonderful at sewing and her sister is great at crocheting. Their shop was full of sweet little things. I bought a headband that I fell in love with. K loves her two children, and the dads get on quite well, too. While I intended on just dropping by and then heading home for lunch, K was having such fun and so were Y and I that we just bought lunch there and didn't get home until nearly 2.


There were probably 20 or so food stalls and shops, ranging from handmade items, homemade jams, and used toys, to a massage tent, fresh produce, and A FABRIC SHOP!!!! Gaaaa!!! I was in heaven. The shop had gigantic boxes full of little fabric bundles, as well as large swaths of cut fabric. A lot of the fabrics were for curtains, so they were either really quite thick or super sheer. I have no need for a lot of heavy-weight fabric, so instead I went to the boxes. It was an all-you-can-fit-in-a-bag deal, with a full bag costing 100 yen - $1.25. I couldn't pass this deal up - it was amazing! I felt like I was doing something naughty by stuffing the bag to the brim with fabric rolls. I ended up with this collection.


Out of the lot, I think these were some of my favorites.


I am so excited to get going on a project using some of my few fabrics. I hope to have something done up by Friday, as I halfway planned it out last night. Hopefully Wednesday night, once the final Halloween party is finished, I can finally get on with things other than Halloween!!


Friday, October 26, 2012

Halloween Party 1

 
This past Tuesday we had a few friends come over for the first of K's three Halloween parties this year. Since we don't do trick-or-treating here (I hope to bring that tradition once K gets a bit older), I figure let's just party it up!
 
For the party, I made two things that I think are worth sharing - mummy juice boxes and chocolate fudgy cookies - starting with the juice boxes since I think they are so super cute and SIMPLE to make. I think I saw this online a few years ago and it just kind of stuck in my mind. I have no idea where I originally saw this (or if I even did??), so I 100% apologize if I am not giving someone else credit where credit is clearly due. I cannot get over how cute these little guys are!
 
 
All you do is get some gauze that you wrap around your arm or whatever is hurt, as well as some tape (I used surgical tape), and some googly eyes. Take the straw off the juice box and tape the end of the gauze to the box. Wrap the gauze flat around the box a few times until you can just barely make out the images on the box. Then scrunch the gauze up and wrap around a few more times. Once it is sufficiently covered cut and tape the end down. I tried to finish the tape on the back or side. Then glue two googly eyes on and you are done. The kids didn't seem to make a bit deal of these, but the moms thought they were adorable. Maybe they were a bit wasted on five kids aged two to four? Ah well, they were cute. I'm happy I made them.
 
 
The second bit of this post is about these AMAZING cookies. Holy Moses, were these delicious! I saw similar cookies on Sweetapolita's blog a few weeks ago and wanted to make them ever since. On her cookies, she used a glaze instead of the orange-colored candy melts and colored sprinkles. Hers are much more celebratory looking, but mine are all about Halloween!
 
I followed the cookie recipe exactly as it is written. Seriously, these cookies are amazing. The moms and I each definitely had our fair share. The recipe says it makes 12 cookies. Those must have been HUGE cookies. I ended up getting about 40 if I'm not mistaken. I used a tablespoon to measure out the dough and this made a good-sized cookie, in my opinion. I think if they were much bigger, they would be a bit too much of a good thing. I like to eat my sweets little by little.
 
 
The first set out of the oven turned out just beautifully. The tops had a perfect flaky layer (almost like a brownie) and the middles were fudgy and gooey. Gaaa!!! Why did I eat the last cookie last night!?!! The second set out of the oven did not fair as well. I think the dough started to dry out too much and they didn't spread out at all, nor did they have the beautiful flaky outside. The good news is that the taste was the exact same, also once they were covered you really had to look to see the difference.


By the time it came to scoop out the third set, the dough had dried so much that I could roll each one into a little ball and then give a bit of a smoosh. These ended up beautiful looking, and delicious as well.


The final step was to coat half of each cookie in orange candy melts (OMG!!! I found a baking shop here that sells candy melts, and Wilton brand at that!!!!) and then a few chocolate sprinkles. I had never actually used candy melts before. They taste fine, but more importantly they look fabulous and are so simple to work with. I melted mine in the micro and then coated away. I'll definitely be making these guys again. Soon.
 
 
The guests at the party included Buzz Lightyear, Snow White, a witch, Batman, and of course Sir Topham Hatt. It was impossible to get all five of the kids together in one photo. This one will have to do - three out of five isn't that bad.


K got hot as the party went on, so we took off his morning coat. As my friend pointed out, his costume instantaneously morphed from Sir Topham Hatt to a bartender. I should have given him a shaker to carry around.


Party number 2 - the one at the kids' community center - is tomorrow morning. Hopefully I'll write a post about it on Monday. Check back then to see what is sure to become K's most prized possession.

Thursday, October 25, 2012

Tutus and Slippers

 
Early this month, I wrote five posts about K's Sir Topham Hatt costume - his vest, his pants, his tie, his jacket, and his top hat. The time has finally come! On Saturday we will head to a neighborhood Halloween party hosted by the kids' community center and staff are expected to dress in costume. K will sport his Sir Topham Hatt gear. As staff, I had to come up with an outfit for myself. The previous two years I have been a butterfly and a monkey. This year, I decided to girl it up - I'm going to be a ballerina!
 
OMG did I have fun making this outfit. I started out with pink, soft tulle for the tutu. I bought two meters of it, folded it in half, and sewed a line down the length wide enough to case elastic. It was so simple to make, but because the tulle was soft, it just kind of fell. It didn't look ballerina-y at all.


While you can't tell from the photo, it was also almost to my knees making me look more like a waitress than a ballerina. I folded the fabric up and thought about cutting it a few inches shorter, but it would do nothing about the lack of fullness. I asked a few friends for their opinions. One friend suggested I cut and then sew the cut bit to the bottom in a ruffle of sorts so that a bit of volume would be added to the bottom. Another friend suggested I get really stiff tulle and make a tutu to go under this one that would force a poof. I opted for the second suggestion as it seemed like less work.
 
 
I got to sewing a second tutu and voila! The poof was born. It sticks out a huge amount. So much so that the pink tutu is no longer too long. This version looks much more like a ballerina. For the second tutu, I only bought 1.5 meters and then cut the fabric into 3 equal widths (about 38cm each). Then I sewed a small casing on the top of each and strung an elastic through. This gave me HEAPS of volume!
 
 
The slippers were a simple pattern I'd bought on etsy years ago and just finally put to use. I ended up having to adjust the pattern due to the thickness of my yarn, as well as how far I wanted them up the top of my foot, but they worked up really quickly - about an hour and a half in total. Ballet slippers are not complete until the laces tie up the ankles, so I chained a really long line and then strung it through the back of the slippers. 
 
 
This was a super fast costume to work up - and it is adult sized. That means for a kid it would be even faster and you'd use way less fabric. I will say that it was my first time working with tulle and I was really scared. If you have the same concerns, take my word for it - tulle is super easy to sew. Since it isn't slippery at all, I didn't even pin it. I just folded the first bit, started the machine up and then folded as I went along. SIMPLE!
 

Wednesday, October 24, 2012

Baby Yoda


One of my best friends in Japan is preggers!! I'm so super excited for her. She found out last week that she's having a boy. Awwww...I can't wait!

Right around the same time that she found out it is a boy, we mailed a few funny Halloween costumes for next year back and forth. A lobster in a pail, a lawn gnome, you know, classics. I'd sent her a baby Yoda photo and she mailed back that the ears/hat were too cute.

It just so happened that we would be meeting this past Sunday for her birthday. While a standard pressie would be a nice bottle of champers, being pregnant, that wouldn't work. I'd decided a while back that I'd get her a Chanel nail polish - something completely frivolous, yet useful all at once.

Then on Sunday morning, a stroke of brilliance hit! "I'll make a Yoda hat for her baby boy!!" We went out to some airplane/train event for K on Sunday around 11 and I bought some green yarn on the way. K wanted to sit with me on the train, so I couldn't get going on the hat. With a limited amount of time, I was dying to get started.


On the way home from our morning outing to the airport, I finally got cracking.

I used the same pattern that I'd made the butterfly hat from. Instead of the butterfly bit however, I just kept circling on with double crochets. I started with the newborn size, but it looked too teeny, so I added an extra increasing row from the 3 month pattern. Maybe my yarn was on the thin side? Perhaps I was pulling too tight due to the stress of working on a deadline?

By the time we'd arrived home, the hat was halfway done, but I totally needed a nap before heading out for the night. The second we stepped on the train for the 45 minute ride downtown, I was a crocheting queen! I finished the hat quickly and then moved onto the ears. With no pattern, I looked at a photo of Yoda and started cracking.

As I was in such a rush, I have NO photos of the making of the hat, aside from this gem of me sewing an ear on while waiting for the light to turn so we could cross the street downtown.


I sewed the final ear on while waiting for the Chanel woman to ring me up. I don't think I am meant to take photos inside the Chanel shop, but I was so excited that I'd finished in time that I snuck a photo of the hat on a make-up seat. Shhh!!


I think* I did this to make the ears (make two):
R1. Chain 3.
R2. 2sc, skipping the first chain. Ch1. Flip.
R3. 2sc. Ch1. Flip.
R4. 2sc in each sc (now you have 4sc). Ch1. Flip.
R5-7. 4sc. Ch1. Flip.
R8. 3sc. 2sc in final sc. Ch1. Flip (now you have 5sc).
R9-11. 5sc. Ch1. Flip.
R12. 4sc. 2sc in final sc. Ch1. Flip (now you have 6sc - make sure the increase is on the same edge as the previous one).
R13-16. 6sc. Ch1. Flip.
Edging: Right side facing, reverse single crochet around the long edges of the ears.
Sew ears to the bottom of the hat with the flat edge on top.

*Seriously, I have no idea what I did as I was doing it so quickly to just get it done. But I am pretty sure it went something like that.

A few weeks ago, my friend mentioned that she's not big on crocheted/knitted things for babies. I told her that it was cool if it never graces her baby's head as it was totally worth making to see her reaction when opening it. She responded with, "there's knit stuff and then there are Yoda ears...they WILL be worn." Yay!!