Sunday, December 30, 2012

Pecan Chocolate Chip Pie

 
Thursday I posted about one of our Christmas Eve dinner desserts, an apple pie. While this was supposed to be posted on Friday, today you are finally being introduced to the pecan pie that literally made my friend giggle when he ate it. I know it's so lame to say that I'll post something "tomorrow" and then tomorrow turns into days later, but to be honest, I've been exhausted from making Christmas dinner, New Year's meal (Osechi), packing to come to Yokohama, and just the holidays in general that I have just passed out at night. So, sorry!

To be honest, I don't love pecan pie, but that or a pumpkin pie seem like a necessity to me. I really dislike pumpkin pie - I love all the spices and pumpkin flavors, but the consistency grosses me out. Pecan pie, on the other hand, is really just a bit too sweet for me. Crazy, I know.

I found this recipe a few years back and while it's super sweet, I do like a little slice now and then.

It starts out with the same crust as yesterday - 300 grams flour, 200 of butter, 100 of water and a bit of sugar. Let it chill a bit, then roll it out and put it in the pie pan.


Then work on the filling. It is really simple. Melt butter, mix together egg, brown sugar, flour, vanilla, dark corn syrup, and bourbon. I've yet to see dark corn syrup in this country, but I used light corn syrup and it's fine.


Stir in the pecans and chocolate.


Finally pour it into the crust and bake.


When it's all done, it smells and looks delicious. It tastes delicious, too!!


After writing this post, I realized I didn't have much to say about the pie. It is really, really good though and seriously simple to make, so if you have a hankering for a pecan pie, I'd most definitely recommend this one!

Thursday, December 27, 2012

Apple Pie - Flower Style


On Christmas Eve we had some friends over for Christmas dinner. At my parents' house, we usually don't do turkey on Christmas as it was just done a month prior for Thanksgiving. Usually we do a ham. If I've returned home for the holidays, however, my mom usually does both since I LOVE turkey.

For our dinner I roasted a turkey, made mashed potatoes and gravy, stuffing (which much to my guests' dismay was not actually stuffed into the turkey), carrots with cashews, cauliflower with prosciutto, green bean casserole (made from scratch since we don't have any of those canned goodies here), applesauce with cranberries, rolls, and of course dessert - apple pie and pecan chocolate chip pie.

I posted about an apple pie last month, and used the exact same recipe - only making the crust slightly smaller, 300 grams flour, 200 grams butter and about 100 grams water, plus a bit of sugar. The recipe for the apple mixture wasn't changed at all, but the process is slightly more involved than just peeling, slicing, mixing, then carelessly putting it in the pie crust.

First you start with your apples. I used six. For this pie it is better to have too much than not enough. Also, try to make sure they are nice and firm. If not, when you are mixing them with the cinnamon sugar deal, they will fall apart and you will be very sad. Peel them.


Then slice them in half from top to bottom and core them. If you have an apple corer (I don't) you would definitely want to use this as cutting with a knife is a tad tedious. If you are using a knife, be really careful that you don't cut too far into the flesh. If you do, the apples will break and you will have a difficult time making the flower.


Next horizontally slice your apples into fairly thin pieces. If they are too thick, they will not bend with the round shape of the pie pan. If they are too thin, they will be too bendy and won't hold the flower shape well. You do, however, want a few that are on the too thin side for the very middle part of the flower.


Next CAREFULLY mix your slices with the flour, sugar, cinnamon, nutmeg concoction. Be super gentle as you want to keep as many apples whole as possible. Some will break, and that is okay, but you need nice, big slices to form most of the petals. It is a bit difficult to stir them up really well, so I usually do my best and then let them sit for a while so some of the juices can seep out of the apples, making them a bit softer.


While they are resting, I usually roll out my pie crust. Roll out as usual and stick it in the pie pan. Save any leftovers for decorations for the top of the pie. Give your apples a few more stirs. It should be much easier and the flour/sugar situation will turn to a beautiful liquid. Yum.


Then start layering them into the pie crust. Start at the outside and overlap each "petal" a bit. Then just keep going around and around until you get to the middle. When you are putting the pieces in, try to place any super thin, pliable ones aside and use them to your adantage in the middle.


Once the flower shape comes together, you might find that you have a TON of apples left over. That is great! The apples will get smaller as you bake the pie, so you really need to fill the pie to capacity so that you are left with a beautiful flower at the end of baking, instead of some sad, half-flower thing.


Just shove petals in between other petals until you have used up all of the slices. Your flower should look really full at this point.


You will likely have some liquid left over. Just pour it over the pie in a fairly uniform way so as to distribute juices all over. I know this picture and the one above look really similar, but if you look closely, the petals in this one are all shiny because of the liquid.


Then roll out your extra dough to about the same thickness as the pie crust itself and cut it into some shape. I usually do leaves and then score them to make it look like they have veins, but anything is fine. As it was Christmas, I opted for a little star. Then cover the dough shapes with sugar.


Finally, pop it in your oven, pull it out 50 minutes later and you will have a beautifully baked, delicious smelling, cinnamon gurgling pie. As it cools down, the liquids will settle down as well and leave you with a gorgeous flower. So cute!

 
I'll hopefully post about the pecan chocolate pie tomorrow night, but it is going to be a bit busy as I have to pack for our New Year's trip. When my friend took a bite of the pie, he started laughing. I was thoroughly confused, but he just kept laughing. He finally explained that it was just "silly good". Stay tuned!

Wednesday, December 26, 2012

Merry Christmas!


I took a few days off to celebrate Christmas with family and friends, but now I'm back with lots of baked goods and handmade Christmas pressies to show you all!

I'll start today with the Japanese tradition of Christmas cake. My first Christmas here, around November I started noticing tons of advertisements for cakes with little candy Santas and mushrooms on them. I didn't really get it. The longer I've lived here, however, the more I've noticed that Christmas cakes are definitely a must here. Everyone has a Christmas cake - most ordered from grocery stores or bakeries. I, however, have always made mine. That being said, our Christmas cake tradition only started a few years ago.

The first one I made was a strawberry cheesecake. The next year's was a sponge cake with chocolate buttercream and handmade royal icing toppings - a free-standing house with a cobblestone path, trees and a "Merry Christmas" sign. Last year was a traditional Bouche de Noel and finally this year was a raspberry and chocolate mousse layered cake.

This cake took a lot of work, but the mousses were delicious and well worth it. The cake starts off with making a standard sponge cake. I used an Emeril recipe and while you were only meant to bake it for 15 minutes, I had to bake mine for close to an hour. I finally just took it out, because I got nervous I'd over bake it. This is so disappointing, but it wasn't done. When I sliced it open, I realized it really should have been baked longer. The result was kind of like a really thick crepe.


Alas, I kept on with the show since I was low on time and didn't want to make a whole new sponge cake. The next step was to cut the circumference of the cake about a centimeter or two smaller, then slice it in half horizontally.


Next came the chocolate mousse.


Then you have to freeze the mousse to one layer of the cake.

 
Next you need to puree raspberries...


to make the raspberry mousse.


In the original baking pan, I layered the other cake half and the covered it and the side bit with the least amount of mousse as possible.


Then pull the first cake half out of the freezer and put it on top, cake side up. Then cover with the remaining raspberry mousse and freeze the whole cake.


Once it's frozen, take it out of the cake mold and put it on top of a wire rack hanging on top of a bowl.


Finally make the raspberry glaze for the top.


Pour it over the frozen cake a few times until it's the color/thickness you want.


Finally refrigerate it and then decorate it - I used dragees and a meringue Santa. I ditched the mushrooms because I still don't get their connection to Christmas. I decorated it first and my little dragees soaked up the liquid and turned to balls and Santa sunk into the cake a bit.

 
Had I properly baked the sponge cake, this would have been delicious. Total bummer since it was a lot of work and I'll likely never make it again.


If, however, YOU want to make it, leave a comment and I'll add in the recipe. It seemed like a lot of work to type up if no one even wants it!

Friday, December 21, 2012

Polvorones (Mexican Wedding Cakes)


Polvorones hold a special place in my heart, not only during the holiday season, but just in general. They so very much remind me of my mom. Their wonderful sweetness and the way they melt in my mouth, take me straight back to being a kid and in my mommy's arms.

I don't think there is any traditional connection between Christmas and these cookies, but my mom used to make them (what seems like) every year. Maybe it's because they look like snowballs? Maybe it's because they are really quite easy to whip up and no one needs unnecessary complications during this season?

Regardless, on Monday morning, K and I got to cracking on these cookies. He always has such fun helping me bake (notice he was wearing his Sir Topham Hatt costume with his pajama pants, as you do). Anyway, you start by creaming 1 cup of butter, 1/2 cup of sifted powdered sugar and 1 teaspoon of vanilla.


In a separate bowl, combine 2 cups of flour, 1/2 cup of finely chopped pecans and 1/4 teaspoon of salt. Once that is combined, stir it into the butter/sugar mixture. I just used a rubber spatula to do this.


Then roll them into 1 inch balls, I think I used a half teaspoon as my measure, and then bake them at 325F for 20-25 minutes.


As soon as you get them out of the oven, roll them in powdered sugar.


I find that if you use your hands to do this, the warm cookie dough and the sugar stick to your fingers and make a bit of a mess. I used two forks and it worked like a charm, although it is a tad on the time consuming side.


Once they are cooled, roll them once more in powdered sugar and they are ready to go!


While we were making the cookies, I kept telling K that the cookies are for Santa. I told him the whole story about how good boys and girls get toys from Santa, who flies from house to house with his reindeer. The more I told him about Santa, the more he wanted to know. I think I've told him the same story about a million times this week. While the cookies were cooling, we wrote K's first letter to Santa. He dictated while I wrote, it cracked me up.

Thursday, December 20, 2012

Chocolate Coconut Balls and Cookie Cards


Since I was all geared up to get Christmas happening in this place last Sunday, once I was done with the ginger crinkles I moved on to chocolate coconut balls. This was another recipe I received from Food Network's 12 Days of Cookies. It is an Alton Brown recipe, which caught my eye as I don't think I've ever made an Alton Brown recipe and not loved it. These were no different!

The recipe calls for macadamia nuts, but I went to the grocery store and to be honest, the macadamia nuts were going to cost a fortune. Instead I opted for almonds, figuring the recipe calls for almond extract, so the taste couldn't be too off. I started by chopping up the almonds and then mixing them with the coconut, sweetened condensed milk, and (only 1 teaspoon of) almond extract. I've yet to find sweetened coconut in this country (so sad), so I just used regular shredded coconut. I imagine that with the sweetened coconut, these would be even more amazing. I looked at the comments and someone had suggested refrigerating the mixture at this point as it made rolling much easier.

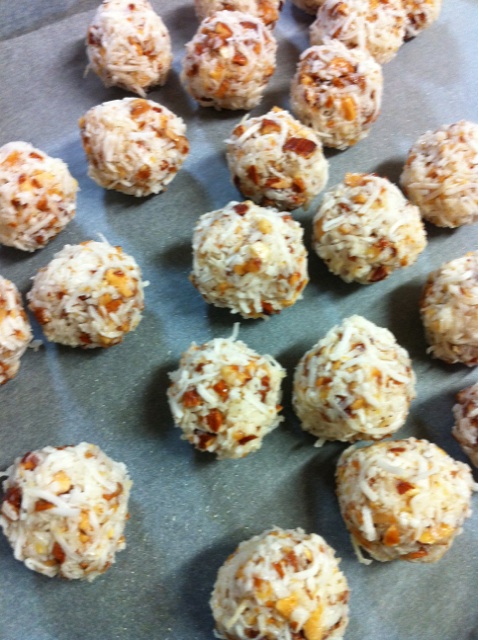
After about an hour in the fridge, I started rolling the little balls. The mixture stuck to my hands a bit, but it wasn't a bit deal at all.


Once the balls are all made, they go back to the refrigerator for a while.


Then it is time to coat them in chocolate. The 12-ounces of chocolate the recipe calls for seemed a bit extreme so I started with 6, but had to add 3 more. Wasting chocolate is a sin in my book. I did add the shortening to the chocolate, instead of my usual oil and it worked just as well. I couldn't tell a difference to be honest.


Whenever I dip balls into chocolate, I always search for a plastic fork first, break off the middle two prongs and use that to do the dipping. I have found it works super well. I also used a spoon to help move the ball around or pour on a bit more chocolate, just to make sure it is coated well.


Once all of the balls were coated, I put them into the refrigerator again to harden up.


Then Y and I sampled one...after dinner, we each had a few more!


These are so super simple to make and delicious - they taste like an Almond Joy. Mmmmm...Almond Joys.

On a cookie related note, I just got the sweetest cards in the mail this afternoon. I know...cookies and cards rarely go together, but stay with me here!

A few weeks ago, one of my best friends from college, a graphic designer) told me that she, her sister and their aunt started a card company. Apparently they started it a while ago, but she didn't want to tell any of us in case we would feel pressured to buy (she is so cute!). I totally wish she would have told me sooner!! The reason she had told me about them is because one of their lines of cards uses their own decorated cookies as images - what an adorable idea.


I took a look at Rosebud's website and fell in love with so many of the cookie cards that I wanted to buy them all, but alas I only bought a few cards and gift enclosures.


I was their first overseas customer (they are based in the US), but ordering was simple. I just sent an email to Rosebud's address, told them what cards I wanted and my address, then I was sent a PayPal invoice. The response was super fast and I was able to pick how I wanted the inside to read (blank was fine as well). At my friend's suggestion, I chose for them to read "Wishing you the sweetest of seasons". Eeek, are they so cute!


The cards arrived quickly and are really beautiful. The card itself is on very thick, Crane's cotton paper (who doesn't love Crane's stationery??) and the printing is just perfect. While I adore the cookie cards, the Christmas card she sent to our family is gorgeous as well.


Y immediately commented on how Japanese it looked. It definitely does. It even has the hiragana for the first letter of her name. How cool!! All of these Christmas cards can be found in the "Holiday" link. And while it is a bit late this year, they also have beautiful Hanukkah cards in case Christmas trees or cookies aren't your thing.

But seriously?? How could you not love this one? My friend referred to it as their "greatest hits of Christmas cookies". Sugar and spice DO make the holidays nice!


In addition to the Holiday cards, they have adorable greeting and birthday cards, as well as invitations, place setting cards, and even baby announcements. These are just a few of the greeting and birthday card options.


OMG do I adore those giraffes!!!

Rosebud was a wonderful company to work with. Not only are the cards so sweet, of wonderful quality, and extremely creative, the owners were super quick to respond to my emails and always very pleasant. I know that one of the owners is a good friend of mine, but there is no doubt in my mind that every person who orders from them would have just as an enjoyable experience as I did.

As a quick note, this post is certainly not sponsored (I am not definitely not big enough for that type of thing), I just really fell in love with these cookie cards and figured that if you read my blog, you might like cookies and cookie cards too!