Thursday, February 28, 2013

Polka Dot Cake


I really wanted to get this post up yesterday, but now K and I are both sick and I was super tired. I fell asleep at 8:30. What a nerd!

Yesterday one of my best friends, Hitomi, turned 34! She is one of the main reasons I learned to sew. Hitomi is an amazing sewist and makes the cutest things. I wanted to be like her. I wanted to make cute things too, so I started sewing. When I think of Hitomi, polka dots and pompom trim come to mind. I wanted to make a dot-inspired cake. I came across this cake a few weeks ago and fell in love!

I started with a Sweetapolita recipe, but I only made 1/3 of the recipe to begin with.


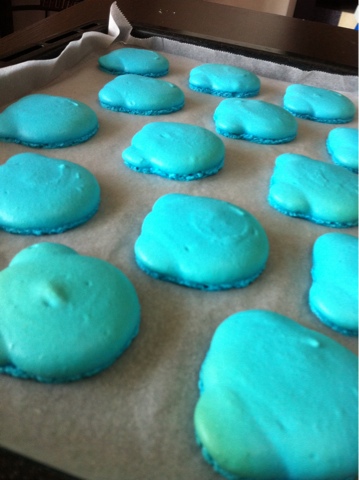
Then I divided the recipe into little cups and added food coloring to each cup.


Then I put the colored batter into tiny cupcake papers. I really should have divided the batter into three cups per color, but I didn't have enough cups and I didn't expect it to rise so much - whoops!


I LOVE this color combination. It looks like I did some adorable art project.


Then I baked those mini guys for about 15 minutes and let them cool. After that I got onto the main cake batter. I started by making just 2/3 of the recipe, but then I had to go back and do the final 1/3 since it wasn't quite enough to cover the dots well. If you decide to make this cake, just go ahead and make the full recipe from the start.


When the batter was ready, as the first link showed, I put a little batter in the bottom. Then added the cupcakes, but put them on their sides so they would form circles when cut.


Oh how I love these colors!!!!


Then I put batter on top and popped them in the oven. You may notice that I have old towels wrapped around the cake pans. I read this ages ago, but if you wet some strips of towel and then wrap them around the pan, it helps the cake from making a dome. It bakes up so evenly. Best trick ever!


Yay! No domes - but also not enough batter on the top. Luckily I was going to frost the cake, so no problem.


I read about the Viva paper towel trick for smoothing out frosting and gave it a go. I used this buttercream recipe. I really wanted the frosting to be white and luckily the recipe called for margarine instead of butter - wahoo! I frosted the cake and then put it in the fridge and went to bed.


I pulled it out the next morning and tried the paper towel trick to make it smooth and it worked a bit, but was certainly not perfect. I think it's possible that the frosting was just too cold? I want to give it a go again after letting it sit out for a bit.


Then I used little sugar circles to decorate the outside. I will blog about these later - tomorrow perhaps. They are so easy and so fun, but do take a bit of time.


We went to our friend's house and the daughter could not stop looking at the cake and saying how cute it was. My friend was also really stoked on it.


Eeek! I love these kids.


Then we cut it open and bam - dots on the inside! Unfortunately the dots ended up being only two colors. I was a bit bummed, but it would have been really difficult to plan it working out better. Cute nonetheless!


The little girl was so excited to see the inside and all of the kids couldn't wait to eat a piece. They were so cute.


The cake was pretty good. I didn't eat my circle becuase really, it's just sugar, but K and the other kids loved them.


I love that each piece is different. Here was a slice from snack time today.


The cake was a total hit. But what made me happier than the cake were these three kiddies.


Happy birthday, Hitomi-san!!!

Monday, February 25, 2013

Morning Glory


I've mentioned before, in numerous posts, that I teach English to three little girls. During the lessons they earn points and then can buy different things with their points. At 200, they can ask me to make them something out of felt. My youngest girl, who in the past has asked for Totoro and a pink hamster, requested a morning glory.

I've done roses and flowers with petals in the past, but how was I going to do a morning glory with seemingly one huge petal?!?

I looked online for photos of morning glories and liked this one.


I started with a lavender circle and then started cutting away at it. I made five notches for the petals (?) and then made divots between each of the notches.


Then I cut five little magenta triangles and sewed them from the center pointing out towards each divot (yet again, I worked on this while on the train).


Then I sewed on the middle white circle.


Next I embroidered the white lines that seemed to mark each petal. It took ages to sew all of those little lines by hand.


It didn't particularly look like the morning glory from the original picture, but I figured it was good enough. I did, however, want it to ruffle out a little, so I sewed up the very middle of the white circle a bit. I knew it wouldn't get super ruffled because I still had to sew on the back and then stuff it.

 
Once I did that, the indentation in the middle puffed out a bit. Bummer. Luckily, the white lines helped to keep the petals somewhat intact giving it a tiny ruffle.

 
I was meant to teach the little girl today, so I rushed and got this finished yesterday, but K got a bit of a cold, so I ended up canceling. Hopefully he gets better soon!!

Friday, February 22, 2013

Lemon and Mint Meringues


For the past few days I've been having a craving for something light, but sweet. Meringues popped into my mind and I couldn't stop thinking about them.

On Friday mornings, K has a mommy-and-me preschool thing, so I figured if I got the meringues in the oven before leaving, they would be perfect for eating as a lunch dessert.

K saw that I was getting ready to bake something and ran over to ask if he could help. I wanted to finish these up as quickly as possible, but how could I tell him no?!? I cracked 2 eggs and he got mixing. I added 1/2 cup of sugar and he still mixed away.


Ages ago, I used to make lemon meringues using a lemon juice powder from King Arthur's. It turns out I really wanted lemon meringues. But then I also wanted mint meringues. What's a girl to do? I split the meringue in half and then beat the lemon juice powder into one of the bowls and a few drops of peppermint essence into the other.


To distinguish them, before piping I used a food paint brush and some gel coloring and painted four lines up the side of the bag.

 
I tried really carefully to drop the meringue into the center of the piping bag. I didn't do a great job, but it worked nonetheless. Then I piped away!


The recipe I used, not the one I used to make all the time since I couldn't find it, said to bake them at 120C. From memory, this seemed a little high, but I did as was told. After 20 minutes, I checked on them and they had browned a bit. I was so sad!

I turned the heat down to 100C, set the timer for another 45 minutes, and took off with K. By the time we got home, the meringues were light and crispy, as a bonus I don't think they had browned any more.


After lunch K and I both ate our fair share of meringues. He could have eaten them all. In fact I don't even know how many he ate since I was cleaning up the lunch mess while he was eating. All I know is that there were significantly fewer by the time I got back to the table.


After naps, a friend of mine came over and K begged for more. I'm such a sucker. He got a few more before I put them away, the spoiled little boy!! ;)

Wednesday, February 20, 2013

Bear Macarons


I have no idea why or how, but I came up with an idea to make bear-shaped macarons. I've seen heart-shaped ones, but never bears and I don't know why! They turned out so stinking cute!! Could other animals work as well?!


I originally planned on doing these for the baby shower, but decided that one type of macaron would be enough. To be honest, I was also kind of worried they would flop and given the lack of time I had, I didn't want to risk it. Instead, I figured I'd give them to Brandon after the baby is born, knowing that even if they turned out as mutants, she would 1) get a good laugh out of it and 2) appreciate the effort regardless.

I started with my tried and true recipe from Cecile Cannone's book. Since Brandon's baby is a boy, I thought blue bears would be appropriate.


Once the batter was all mixed up, I got to piping. I was a bit worried about how to get a bear shape, but I just went ahead and did it. I started with the left ear, piping just a tiny bit and then dragging the tip over to do the right ear. Then I picked it up and piped a standard circle.


Some of the bears had a bit of a cone head. I think it was from the ears pushing down on the face and then leaving no where for the batter to flow, except for up, between the ears. I was really bummed, but just kept on piping.


They baked quite nicely, and held the shape which is what I was most worried about. A few of them, like the bottom center one in the above photo turned a bit blobby, but they can't all be perfect, right?


Plus when they are all lined up like that, few of them are really perfect. But, most are close enough.


I was also stoked that they got a little foot on them. Always important in a good macaron. That being said, while they are in the oven, the foot is huge! Then they always fall a bit when they cool. Bummer.


I figured it would be too difficult to make sure the front and back ears matched up perfectly, so decided against even trying. Instead I piped standard circles for the back. The ears are pretty tiny, so I didn't think they would fall off - and they didn't.

 
The next step was to fill them. I went with a coconut ganache (also from the book, but tweaked a bit beacause I thought it might be too runny and added more chocolate) because it is always delicious and also keeps it's shape a bit more than buttercream. Additionally, I think I had made coconut ganache macarons before, and seem to remember both Brandon and her husband liking them, although this is a memory from K's first birthday party, so it may be off.


I loved how they looked all filled and put together, but could not wait to get their faces on!


Uhhh, yum.


I melted a tiny bit of milk chocolate and put it into a piping bag with a small round tip (#2, I think). The first part I piped was their snout (is that the right word?!?). Then I let them dry for an hour or two. I really wanted the nose to stick up from the snout, so I wanted to make sure it was fully dry first.


Then I melted some dark chocolate and used an even smaller tip (#1) to pipe dots for the nose and eyes. After the first few, I played around a bit making some with really round noses and others with more oval noses. I can't decide which one I like better. I love them both!


Eeeek! I love how they look like a tiny army of little blue bears when they are all lined up like that. Seriously, I am in love with these!!!!


The unfortunate bit is that they don't look cute at all once you bite into them. In fact, they look kind of sad.

 
All the more reason to eat them quickly, I suppose! An added bonus is that K seems to get sad when he eats the bears and has only asked for "mama's special cookies" on two occasions. Usually he would sit down and eat the whole batch if I would let him.