Showing posts with label Accessories. Show all posts

Tuesday, June 3, 2014

Baby Shoes


These little feet took their first step a few weeks ago! Ever since they have been taking a few unsure steps a day, but I'm sure they will be full-on running soon.

So things around here have been a bit silent recently. Things around here have also been busy. We moved to the US!! We still aren't settled at all, as in Y has yet to move into our new house, but he did find one! In the meantime, the little boys and I are staying at my parents' house. It has been glorious! I have been taking a little vacation from just about everything, including the blog. But, hopefully I will get back into the swing of things and blog every once in a while.

Anyway, before we left T started standing. It was fine when we were inside our house, but when we went to the park, he wanted to stand, too. When we went to the store, he wanted to chill in the play area with his big brother. Since we didn't have much time to go shopping, I looked online for shoes for him, but I couldn't find any. The smallest I found was 11.5 cm, but he was more like 9.5 or 10 cm. Dude was only 8 months old. Since I couldn't find any, I figured I'd just make them.

I looked online for a little shoe pattern and found this one. Since it looked slightly small, I scaled it up slightly.


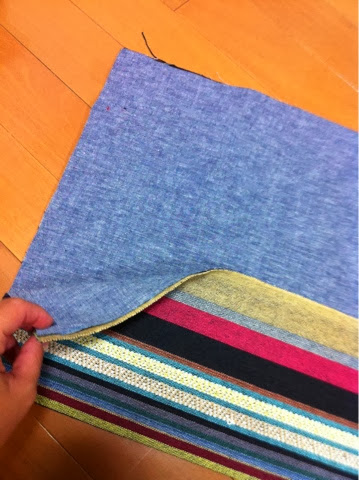
Since I wanted T to be able to walk outside in these, I wanted the bottoms to be leather. I didn't have any leather scraps, so I went to my 100yen store (oh how I have been missing this shop) and picked up a leather business card case.


When I got home, I started cutting it up to get some leather for the soles.


Then I sewed the leather soles onto the fabric sole.


I wanted the shoes to have some sort of design, so I zig zagged a little light blue patch on the front.


Then I sewed the two halves of the back of the shoe together. If I were to do these shoes again, I would have picked a different fabric - this one was an interior weight, which was fine, but as you can see in the photo below the weave was pretty loose. It started fraying after a few wears, which was a tad disappointing.


The other thing I would have done would be to make one bigger piece for this back bit and just fold it over. This is where the most of the fraying started to happen, exposing the elastic that was put in during the next step.


Then I sewed the fabric again to make a casing for the elastic.


Then I attached the front to the back and sewed them both to the soles.


I think they looked adorable, but as above they started to fray. They were also slightly small after a week or two. In the end, they didn't last too long. But once we got to my parents' house, my mom went out and bought him a pair. Now he is taking those little steps in style!


Friday, April 11, 2014

Bunny Bibs


Our move is coming up soon - I know I keep saying that, but it's true - so I was going through my phone making sure that I have uploaded photos of past projects in case they somehow get deleted. Yes, I am super paranoid about something awful happening to my phone. As a result, I found these bunny bibs that I made for my niece ages ago. I adore them so super much!

I started by drafting a pattern for them using a bib that fit T well at that time. It was actually a bib that a friend had made for T before he was born. I love it!


I started with that general shape and size, but then tweaked it to get a bunny shape. I was planning on (and did) connect the ears with a ribbon, so they didn't have to go in towards the center too much.


After cutting out my face fabric, all double gauze, I embroidered their little faces on. I did the outline of the inner ear, eyes, a mouth and I used a scrap of fabric for a little nose, emroidering that on as well.


Here is a close-up of one of the faces. After getting the face done, I basted on the tying ribbons.


For the underside of the bib, I used an organic terry cloth. I sewed it on and then cut around the curves - pretty much the entire bib.


Finally I flipped them right side out and top stitched around. I love how these turned out. I haven't actually seen them on the baby to make sure the fit is good, so I am not 100% sure on them. I don't know why I didn't think to try them on T, as T and his cousin are less than four months apart.

I remember when I made them this one was my least favorite. I don't know if it is the color of the fabric or something in how I did the face, but compared to the others it just didn't look as cute to me once it was finished.


I liked this one quite a bit.


But this flowered one was my favorite. Looking at them now, however, I ADORE the colored dots on cream bunny. I think maybe the way her face stands out looks so sweet to me.


T is eight months today, which means his little girl cousin is nearly 5 months. Maybe she'll get teeth soon and be all slobbery? Maybe she'll be starting solids soon? Hopefully these little bibs will get some use on that little cutie! I hope her mom and dad love these little bunny bibs as much as I do.

Friday, April 4, 2014

Mug Bag


Y started working in a new office as of the New Year. He decided that instead of buying tea or coffee after he finished his travel mug of coffee, he should just take a mug to work and make some there. He didn't want the mug to get the inside of his bag dirty, so he asked if I could make him a bag to carry it. I was thinking about the best way to make one, when I remembered that I made a mug bag for K to take his toothbrush, toothpaste and rinsing mug to kindergarten. I tested that bag on a regular mug and it fit. Perfect!

I wasn't too worried about his bag getting dirty, I was more worried about the mug breaking. So, the first thing I did was sew batting to the lining fabric. I left an inch or so at the top with no batting to make the drawstring bit less bulky.


Since I didn't have enough of the main fabric to cut out one long rectangle, I cut two squares and sewed them together at the bottom to make a rectangle.


Then I sewed up the sides on both the lining and outside fabrics, leaving an inch or so at the top, on both sides, unsewn.


Next I squared off the corners on both the lining and outside fabric. They look like little ears - cute!


Then I sewed the top of the side seams down so that the bag won't fray from the drawstring.


Next I put the lining into the outside fabric, with the lining on the outside, wrong sides together. Although I don't think it's necessary, I was super paranoid about not getting the top bit done well, or even worse having it come apart, so I zig zagged the bags together at the top.


Then I folded the top down twice, and sewed it closed.


Finally, I turned the bag right side out, cut two ribbons of equal length and strung them through the top drawstring. The final step was to pop a mug in there and make sure it fit.


Then I took photos and sent them to Y since he was at work when I made it. He loved how it turned out. It was such a simple bag to make, but I think it's super cute! Yay for clean bags and unbroken mugs!

Friday, March 28, 2014

Power Cord Case


Way, way back in my pre-mommy days, I worked in a Japanese office organizing training for managers in our subsidiaries abroad. This job meant a lot of travel, both within Japan and abroad. I would either jump on the Shinkansen or an airplane probably a few times a month for day trips to Tokyo or sometimes for training sessions lasting up to two weeks. This meant that I had to be organized about making sure I remembered all of my power cords - camera, cell phone, computer, video camera, etc. Every once in a while, I would forget a cord or I would lose it in my luggage creating a gigantic panic. Nothing awful ever happened, but it was always a source of stress.

Ages ago, my "adopted" little brother got an amazing job at Pepsi Co. and I imagined that travelling would be part of his job. If not part of his job, then most definitely part of his private life. I wanted to make a gift for him and decided on a case for his power cords, essentially giving him the gift of less stress. I looked online and found a case that I quite liked and decided to follow that tutorial, with a few minor adjustments of course.

I started with the fabrics wrong sides together in the general shape of the case, just so I could have a better idea of what it would look like. Then I ironed the bottom pocket crease.


Then I took the fabrics apart, matched them right sides together, and sewed the top of the pocket together.


Then I flipped that right side out, ironed it and top stitched.


Then I double folded the edges so that the outside fabric would be the outline of the case when it was fully opened. Before doing that, however, I cut away at the pocket so there was a bit less bulk.


Once that was all folded, ironed and pinned, I top stitched the sides and top.


Look at that pretty mitered corner!


I didn't know what cords my little brother would be using this for, so I couldn't attach a button like in the tutorial. Instead I sewed a twill string to the inside of the bag on one of the edges.


Then using my cords as a general guide, I sewed lines up from the bottom to the top of the pocket to create a bunch of mini-pockets for each cord. I varied the width of each pocket, one is even small enough for a set of headphones - cute!!


All my little brother has to do is fill it with cords, flip the top cover down,


roll it up and tie the string around. Done! Stress-free travel at its finest. Just kidding. I don't think stress-free travel is possible, but I hope this will help a bit. Enjoy your travels, Hermes!!!
 

Tuesday, March 18, 2014

File Holders

K's first day of school

Today was K's very last day of kindergarten in Japan (most likely, at least). It was such a bittersweet morning for us as we woke up early, got every one dressed and hopped on the train to his kindergarten. There we watched the kids sing songs and play instruments, and listened to many speeches. Then we separated into classes and K's teacher had a little ceremony for the class. It was so sweet. She called his friends up by their new classes, but Kan joined the kids who won't be attending the school next year. It was quite sad. Throughout the year, we had our troubles about leaving me to go to kindergarten, but every time he came home with the biggest smile on his face and told me how much he loved school and his teacher. He made so many friends and learned so much Japanese this year. I loved watching him march with his class and sing along to all of the songs. He's gotten so big. I'm so proud of my little guy.

Today, K's last day of school

Anyway, I feel that K's teachers really have gone above and beyond what I expected them to do. He fell in love with all four of them and I did too. They are all so wonderful. While it isn't customary in Japan, K wanted to give them a present; so I thought about what might be nice. In Japan, we have these clear plastic files that every one uses to hold papers. I don't know why exactly, but they are so super convenient and I use them constantly. I imagine that teachers use them even more than me, so I thought making a cute little file holder for each of them would be kind of fun.


I started with the tab that goes at the top. I used the same fabric that I planned on using for the lining. You can't tell, but I put some batting into the tab (and the holder as well), so they were nice and squishy.


Once those were ready, I made the buttons with the same fabric that I planned on using for the outside of the holder.


Once the buttons were made, I sewed and cut in the button holes.


Then I got to work on the outside of the holders. I wanted them to all be different, but with the same fabrics. I looked through my stash and found these that I thought would all be cute together. I used two fabrics for each one and made a little curvy design on the front.


That part took a good amount of time, but once it was done the rest was simple. I just sewed the batting and lining fabric on, flipped them right-side out and then closed up the hole. Then I blind stitched the bottom and about 10 cm up the side so that the files won't fall out.


I slipped a file in the holder so they would know what the gift actually was. I love how these turned out and kind of want one for myself, although I have no idea why I would actually need one. Maybe one day when I am all caught up on projects that I want to do, I'll get around to making a new one for me!