This is actually a cake that I made months ago! I don't know why it took me so long to post about it, but here it is and if my memory serves, it was AMAZING. Just by the title, you can see it was a good amount of work. While it is not a cake I will make all the time, it was certainly worth the time and effort, and will be made again one day.
I can not imagine that I would be able to find dulce de leche (component #1) anywhere in this country, and so I made it. This is super simple to do and so delicious. I kind of want to make this again so I can just snack on it. Maybe I will wait until after the baby is born - I can imagine the doctor wouldn't be too pleased with me snacking on sweetened condensed milk. Bummer.
Anyway, that is pretty much all dulce de leche is - sweetened condensed milk. I put about 200ml of sweetened condensed milk into a glass pan, put that into a square pan, and add water to the square pan to form a water bath.
Then cover it with foil and set it in the oven for about an hour at 220C.
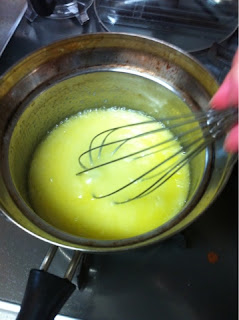
Once it is browned, I probably could have let mine get a bit more caramelized, pull it out of the oven until cool. Then whisk it. It starts off looking chunky and really gross and like you just wasted delicious sweetened condensed milk, but...
keep stirring and it turns smooth and delicious looking. Then let that sit until you need it for the cake. By "let it sit" I mean snack on spoonfuls of it while working on the cake.
Next up is the hazelnut praline (component #2). A while back a good friend of mine gave me some raw hazlenuts. To be honest, I didn't know what to do with them, which is why I decided on this cake in the first place - it called for raw hazlenuts! The first step is to toast and cool the hazlenuts.
Then you work on the brittle - melt the butter, then add all of the good, sugary bits.
Once it is all carmalized, add in the baking soda and salt. Then the hazlenuts.
Spread it on a cookie sheet lined with parchment and let it cool.
Once it is ready, chop it up a bit and eat it. Not all of it, but seriously it is so delicious that you will not be able to resist having a few pieces.
Throw it in a food processor and pulverize it. I decided I didn't want mine too powdery, so I left some bigger chunks in there.
Finally, you get to make the cake (component #3). The cake does take a bit of preparation, but nothing too difficult.
It was a super moist, delicious cake and I think just this cake as a base for about any topping would probably be a winner.
As per one of the comments, I baked mine in two, 8-inch pans instead of one, 10-incher and it worked beautifully. I did lessen the baking time, but that is always a plus in my opinion!
Now that the three components are done, it is time to get cracking on the assembly. Plate the cake and then get your dulce de leche ready.
I started by piping out some in a square pattern. In the end, I didn't really like how this looked and probably would have free-handed it if I were to do it again.
Then I piped some more around the edge for the hazlenut praline to stick to.
Then sprinkle with the praline. Since I didn't like how the pattern in the middle looked, I dropped a few little chunks of the praline in the middle as well. Finally sprinkle with some sea salt. I didn't measure how much I used, just sprinkled it.
One of my oldest friends from when I first arrived in Japan is starting a cooking show. He is an amazing, talented man and I am sure the show will be a huge success. He invited us over to his house for lunch and to discuss the filming of the show. I brought this as dessert. Lunch was amazing! He said it will be a featured recipe on his show, so be sure to keep checking out Michael's Chubo until it is up.
After his delicious lunch, we cut into the cake. I thought it was really good, but it would be difficult to declare a winner from this lunch.
That being said, we all ate it!


No comments:
Post a Comment