Showing posts with label Things for the house. Show all posts

Tuesday, December 17, 2013

Advent Calendar - Part 3 (The Final Product)


Ugh. We have had quite a rough few weeks around here. K caught some gnarly virus and had a crazy high fever for four days, and then he got all better. The next day, my throat started hurting and by the following day, I had a fever of 103. And it stayed like that for the next five days. T ended up getting a fever as well, but only for one day. I took him to the doctor the next day and he tested positive for the virus as well. Luckily, his never got bad. The doctor told me to keep a super close eye on him, but he stayed pretty healthy throughout it. Thank goodness. As a result of the plague, which is now gone, I did very little over the past two weeks. The one thing I was sure to stay on top of was the Advent Calendar. Over the weekend, I finally finished the entire thing! Wahoo!!!

The remaining ornaments that I made were two old-fashioned lights, a Santa hat and some holly.


The berries on the holly are super tiny, so I sewed them to a larger green piece of felt first and then cut that out and sewed it and the two holly leaves together.


Next up were a bell and candle.


Then a wreath and a dove with an olive branch. I thought it would be cute to sew randomly through the wreath so it would look like ribbon. It didn't quite end up looking the way I had anticipated, but oh well.


Finally were Santa, Rudolph and an elf. Rudolph is a hot mess, but I wasn't interested in fixing it. I figure this thing is going to be around for a while. I have so much other stuff I need to do before Christmas, so making a new Rudolph (or possibly switching him out for something else) can wait until after Christmas this year. Also, K immediately knew what it was, and that's the important bit.


For these three, I cut out a flesh (or brown) colored square and then drew the face on to the square. Then I cut out the details and sewed them to the square. I did the final outline and then cut out around it all. This was way easier than trying to navigate around a tiny piece of felt. I kind of wish I would have thought about that earlier.

Here they are pre-face, post-cutting.


And the backs of them.


There are four presents: one for K, one for T, one for Y and one for me!


Last up is the star.

 
Here is the tree as of this morning. K is so super cute about it and adores putting up a new ornament every morning. He rearranges them every day to make sure they are as asthetically pleasing as possible (to him). Basically, he thinks this tree is the best thing ever. I love him. 
 
 
Here's a close-up of the tree with ornaments and presents. Looking at it makes me so super excited for Christmas!!!
 

Thursday, December 5, 2013

Advent Calendar - Part 2


Last night, I got cracking on a few more ornaments - a snowflake, a candy cane and a snowman face - for the Advent calendar. Each ornament is only one main layer of felt, but I thought they would look more finished if I stitched all the way around each one. I like how they look, but I'm not going to lie, it is kind of a pain on the little edges or corners. The candy cane got particularly messy. Ah well. The beauty of this little calendar is that if I decide I don't like an ornament or two, I can just redo it after they are all done - or more likely on November 30th, 2014.

I am now up to eight ornaments, mind you, tomorrow morning is the 6th. I really have to keep moving on this. Anyway, here are close-ups of the other five ornaments. These were the first two that I made, little ornaments (ha! ornament-shaped ornaments).


The next three were a stocking, a pair of mittens, and a gingerbread man. K had no idea what a gingerbread man was. Maybe I should add them to our Christmas cookie list!

Tuesday, December 3, 2013

Advent Calendar - Part 1


I took a little bit of a break from the blog last week. With a baby who decided that 2-5AM were ideal playing hours, I was exhausted. Honestly, there were a few nights last week that I went to bed at 7, same time as the boys. Over the weekend, since Y was here to watch the boys in the morning while I caught up on some sleep, I got started on an Advent calendar for K (and for T, but not for a few years). I know I started a bit late - on Friday, November 29th!! - but I had a few other projects at the end of the month that I needed to get done before I started this, which I'll blog about later.

I'm not joking at all, when I tell you that K has been asking to put the Christmas tree up since last February. Sometime during the spring, I told him that we can't put up the Christmas tree until after Halloween. After his Halloween party, I had just gotten everything cleaned up and was making dinner when he came to the kitchen and said, "whelp, I guess it's time to get the Christmas tree out." He said it like it was some huge chore, and yet obviously he had been waiting for ages for that moment. Poor guy, but I explained a bit further - the tree isn't coming out until December. He took it well, but towards the end of last month, it was a constant barrage of, "What number day is it today? When will it be December?" I figured that if getting the tree out was to be this exciting, the actual day would be exciting as well and he needed a countdown of sorts. I looked online and found a few Advent calendars for inspiration, and also tried to recall the one from my childhood. Then I just went and did whatever I wanted anyway.

I started with the pockets. I decided that I would do only up until Christmas Eve. I imagine that Christmas morning K is going to have little interest in putting on that last decoration - seeing what Santa left him will be much more exciting. I made the pockets 6cm squares. So I cut out a big rectangle that measured 28cm (enough for the pocket plus 1 cm at the top of each row) by 36cm. Then I cut four pocket strips, each 6cm by 36cm.


Then I got to work on the numbers. I bought iron-on felt for this bit. I drew all of the numbers starting with all then ones, then the twos, threes, etc. I wanted them to be as uniform as possible, but knew that they were going to be far from perfect. I'm cool with that for this project.


I slowly filled up the squares with their numbers.


Once they were all on, I took the backing off and iron-ed away (note: this photo is pre-ironing).


Then I sewed a tiny white and green pom-pom trim to the large rectangle.


Eeeek! It's so cute!!


Finally I sewed on the pocket strips and got to work on the tree. The tree is about 36cm wide on the bottom layer and about 40cm tall.


Then I sewed all of the bits onto a huge piece of white felt.


For the tree, I sewed on each of the green layers separately. I don't know how that middle layer got so wonky without me noticing, but it will just have to do. Trees aren't perfect anyway and I figure with the ornaments on, you probably won't be able to notice.


I set it out so that on December 1st, when K woke up he could put the first ornament on. I was sleeping, but apparently K saw it, threw his arms in the air and yelled out, "CHRISTMAS TREEEEEE!!" I love that little guy.


So far, I have only made five ornaments. I figure as long as I make a few each night, I should be able to stay ahead of the game. I figured with the ornaments being so tiny (no more than a 6cm square), they would be quite quick to whip up. I was wrong. This is going to be a labor of love for sure. Wish me luck!!

Friday, November 1, 2013

Halloween - K's Party


Today we hosted K's Halloween party. As you may recall, the party was meant to be earlier in the week, but then K got sick so we rescheduled for today. This is probably a blessing in disguise, because these kids were so wound up, I doubt many of them got to bed at their normal bedtime. Having the party on a Friday night is probably better than during the week.


We ended up with six three-year olds, two one-year olds, and T for a grand total of nine kids (counting T is a bit cheating, I suppose). I'm beat. This post, just like the post from the party a few days ago, is going to be a huge one full of photos!

Let's start with the food! I decided that this party would have a bit of a monster theme going on, so I started with some monster sugar cookies. I used my regular recipe, but to make things a bit easier I only did three colors of frosting.


I started by making a ton of little eyes out of royal icing. I did these last week so they had plenty of time to dry out. Once they are dry, they just pop off the parchment. Simple. I did them in a variety of shapes, some with the pupil straight, others where the pupil is off to the side.


Once the cookies were all baked, I divided them into three groups to make the frosting bit easier. I didn't end up with all of one color and I didn't even have to think about it. I also separated the eyeballs by size so that adding them to the cookies would be simple.

 
It was pretty fast to get these all decorated since it was just one color for the entire cookie. All I had to do then was add a few eyeballs here and there. 
 

To make them a tad bit more interesting, I took a toothpick and made spikes on some of the cookies. Once they were fully dry, I added black mouths and a few of them even got little teeth.


They looked so cute as a little set. The kids ate these up like nobody's biz. The moms kept commenting on how cute they were. Success!

 
The other food that I made for the party was monster brownies. I thought it would be fun to have pre-frosted brownies with some little toppings so that the kids could make their own monsters. I started off by making some brownies. I used a new recipe, but to be honest, I didn't love it, so I won't bother sharing the link. 
 
 
They taste fine, but that delicious, delicate, crunchy layer on top got really thick. This made them really difficult to cut. Thank goodness I had planned on frosting them.
 
 
Also, they were super sweet (and that's saying a lot coming from me). Because of that, I made the frosting on the not-very-sweet-side. I did a cream cheese frosting with 226g of cream cheese, 42g of butter and just one cup of powdered sugar. Then I colored the frosting, again doing three different colors, and frosted all of the brownies.
 
  
Since there were nine brownies, but only six kids (of partying age), I did up three monsters as examples.
 
 
I think this was my favorite part of the party. The kids were so funny making their little monsters. K used only yellow on his, but then decided to add some brown hair.
 
 
Another boy spent ages making his face and then when it was all done, he took a big handful of coconut, put it right on top, and said, "haha, I covered his face." One little girl didn't do too much to her brownie, but just loaded her plate with M&Ms and other candies. They were cracking me up!


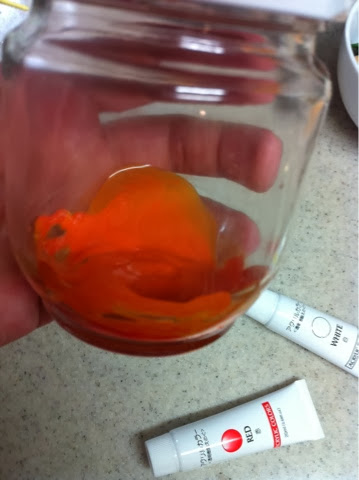
Aside from brownie decorating, I thought it would be fun to do a little craft. I wanted something that would be easy and quick. I came up with little painted jars. I often save glass jars just in case I need it for something and luckily I did, because it meant I was able to do this craft with the kids.


A few weeks ago, I tested this out to see if it would work and lo and behold it did. I put a few drops of acrylic paint into the jar and then added a few drops of water.


Then I put the lid on and shook it up a lot.


Eventually the whole jar got covered. I found, however, that with the lid on, the paint would slide down the edges of the jar. So, I would shake it up, open the lid and let it dry out a bit. Then I repeated that about a million times until the paint was fully dry. Once they were all dried out, I drew little faces on them and that was that. While I didn't take any photos at the party, this ended up working out well. It was quick and easy and the kids seemed to have fun drawing on the faces. That being said, we didn't open them to let them dry. Moms can deal with that at home.


We also did the ghost bowling. It wasn't very structured at all, as the kids seemed to have a difficult time with it, but it was cute nonetheless. After they knocked down all of the ghosts (they just kept throwing the ball until all of the ghosts were down), they got a candy necklace, extremely similar to the ones my friend made.


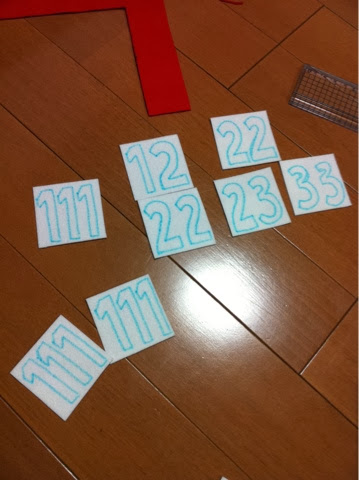
 I got a roll of cellophane wrapping and cut it into six strips. I started by putting a little tape divider right in the middle.


Then I added a piece of candy, put another tape divider, then did that again.


Then I went to the other side and did the same. Finally, I put in the two end pieces and used a different patterned tape to connect the ends together.


Then I made five more of them.


Just like at the last party, the kids seemed to like these. After everyone had left, the doorbell rang and it turned out that one of the boys forgot his and wanted to come back to get it. What a bunch of cuties.

The party was full of crafts, games, food, and playing, but I am pretty sure K's favorite part was when he was sitting with his best friend (first love??), eating snacks and playing with each others' feet.


And just like that, Halloween 2013 is over. I always think that I'll make sugar skulls for Day of the Dead as well, but that has yet to happen. Next year, perhaps?