Wednesday, March 20, 2013

A New Bag (for me!)


About a year and a half ago, my mother-in-law made me a handbag/diaper bag and I loved it from the time I opened it. I adore the fabric she chose and I loved how big it was, without being super massive. I loved it so much that I used it every day and little by little it started to fall apart. I did small repairs here and there, but now the straps are nearly threadbare. I was really sad, but also kind of stoked that it gave me reason to make my own bag, and tailor it to my exact needs.
 
I started by really thinking about what I need in a bag - I really wanted a zippered pocket to carry along and keep clean one spare diaper and a few wipes. K is potty trained, but when we go on long train trips, I still put him in a diaper. He is extremely good about waiting and has yet to use the diaper, but I am so nervous that the time will come and we will be stuck between train stations. I also wanted a small pocket to fit just my phone and keys. Additionally, I wanted a pocket for K's drink, one for my drink and another one to hold hand sanitizer and tissues - the things that always get stuck in the bottom of my messy bag. I, obviously, couldn't find a pattern that suited all of those "needs," so instead I found a pattern in a sewing magazing for the outside of the bag, and then completely ignored the instructions for the lining.
 
Once the outside of the bag was chosen, I bought some fabrics that I love. I think that my mother-in-law's fabric choice was the main reason that I love the bag that was gifted to me. Anyway, on to the bag.
 
I started by cutting out all of the outside fabric and then got working on the pocket.
 

Once the pocket was sewn together, I worked on the outside of the bag. The design has a little wave in it. I don't think the pattern said much about how to do this, but I had sewn something on a wave before (I can't think of what it was) and it turns out it is really easy to do. Line the tops of the fabric up as perfectly as possible and just sew. It seems a bit scary since the sides don't match up, but it turns out beautifully!


Then I flipped the pocket right side out and sewed a double line across the top. This project solidified my desire for a double needle. Look at how crooked the lines are.


Then I sewed it onto the bag, trying to match up the fabrics as closely as possible. I LOVE how the pocket extends into the hipster deer material.


The next step was to literally poke a hole in the bag so I could insert some rivets. This terrified me. I have never used rivets before, but the pattern called for it and I love the look of them. That being said, I hate cutting fabric. All I could think about was that if I mess this up, I would have to recut all of my fabric and then resew it. I was really scared.


Turns out, it is pretty fool-proof and also pretty awesome. It takes a bit of strength to get the rivet in tightly. I could only get it in a little ways, I had to have Y take a few slams at them once he got home from work.


But look how cool they are! They make the bag look so much more professionally made. I am in love with the rivet detailing in this bag.


Now that the outside was ready, I had to work on my lining. As above, I had a number of pockets that I wanted in this bag. I got to measuring and it seemed they would all fit. Yahoo! I started with a small welt pocket to hold my phone and keys. I had never done a welt pocket before and it includes cutting into your main fabric, so again, I was a tad nervous. Again, as luck would have it, it is not nearly as challenging as one might think. That being said, my welt pockets are not the cleanest and I am happy I did not put them on the outside of say a pair of shorts.


Once I had conquered the small pocket, I got on to the bigger, zippered pocket for the diaper and wipes. After that came the drink and sanitizer pockets. For these, I just did a strip across and then divided it into three sections.


Once the lining was done, I moved to the straps. I deviated from the original pattern on this bit as well. I loved the straps on my last bag, so I copied those. It was just two long strips, sew each one with the long ends together, flip and press so the seam is on the underside of the strap. Then topstitch the two long edges. I basted them to the lining of the bag and finally sewed the lining and outside together.


Once the bag was done, it was time for more rivets! Although this was my last, last, last step, I wasn't nearly as scared this time around. I measured where I wanted the rivets and marked the spots - two for each point where the straps meet the bag - eight in total.

 
I like poking holes now that I know it isn't scary and that the result looks so good. 
 

Once again, I had to wait for Y to get home from work to tighten up the rivets, but I definitely gave it a few cracks!


Y has a really weird work schedule due to some training he is doing, so he has Mondays and Tuesdays off for a while. Luckily, today (Wednesday) was a public holiday so we ended up with a three-day weekend! Late last week, I looked up the weather for the weekend and it was supposed to be beautiful - sunny and in the 70s. Given that I am only getting bigger at this point and then we will have an infant, K starts school soon, and the amazing weather, I thought we should go on a quick holiday. Y did some research and we settled on Shirahama - a beautiful beach town on the Pacific coast, famous for their pandas.

We went yesterday and did all of the standard sightseeing things. We went tidepooling, hiking over massive rocks, and were on the path to seeing a gorgeous sunset until the clouds got in the way. We finished the night by going to the beach and playing in the sand in the dark. K had a ball. The forecast changed and it was meant to rain all day today and be a bit cooler (mid 60s), so we got up early and headed to the beach. K spent ages playing in the sand. It was such fun to watch. After the beach, we went to Adventure World and saw the pandas, went on a little safari and saw some sealife as well. K also went on his first rollercoaster - Y was scared, but K apparently laughed the whole time! We also completely dodged the rain. As we were on the bus headed to the train station to catch our train home, it started pouring - what luck!

I finished the bag late last week, so this was it's first real test run. I loved it. It kept everything so organized and was big enough to fit some extra things like a fleece that I totally didn't need.


Also, on Friday I am 20 weeks pregnant. That means I am halfway to meeting my baby!!! Although this photo doesn't do my stomach justice, trust me when I tell you I just keep getting bigger.


Monday, March 18, 2013

Im in Pain!!!


For about the past week, I have been feeling like I need to crack my upper back, something that it seems you aren't meant to do while pregnant, at least not by your husband. It has been more annoying than anything else, but as of this morning it has turned to pain. I think it has to do with the way I am supposed to sleep - on my side, rather than on my preferred positions either my back or stomach. I can hardly turn my neck. It's a huge bummer.

We have these heating/cooling sticky pad things, so while eating lunch I had Y read the label and it says if you are pregnant you are meant to ask your doctor before using. I was at a bit of a loss, until I remembered that some people use hot rice pouches for things like this. I have fabric and rice, I could totally do this!

After I quickly finished my lunch and while K was still eating, Y told me to get cracking on it so I could have it by K's nap time. I started by cutting out two long rectangles - one in a corduroy, the other in a fabric that I just happen to like. Let me state here, that I was trying to get this done in lightening speed so there was no line drawing, just eye-ball cutting.


I sewed three of the edges together - the two long ones and one short one, flipped the bag right side out and then topstitched a little on the short side. Then I filled the bag about halfway with rice.


Finally I tucked in the open ends and sewed the bag shut. I heated it up in the microwave as K was finishing his lunch, wrapped it over my shoulders and put the little one down for his nap. It felt really nice, but quite obviously all of the rice fell to the ends.

As soon as K was asleep I measured the halfway distance between the ends and tried as best as I could to get the rice even on either end and sewed a line down the middle. This helped tremendously. It was a bit finicky, however. If I were to make another one, I would probably fill the bag 1/4 of the way up, sew a line at the halfway mark and then fill the top half with the same about of rice and sew it up - that would have been way easier. Now the bag works really well and I feel like I can turn my head a bit more than I could this morning. Success!


Friday, March 15, 2013

Homemade Jellies (the Japanese kind)

 
This week has been all about K, so I figure we should keep with the pattern to finish out the week. One of K's favorite snacks is jellies - Japanese style Jell-o. They usually come in little plastic cups that kids squeeze into their mouths. While K adores these, I am not too keen on most of them. I think a lot of them have tons of unnecessarily added sugars and many aren't made from real juice. On Sunday, we had pretty crummy weather, so it was the perfect time to do something fun (and delicious) with the kid.

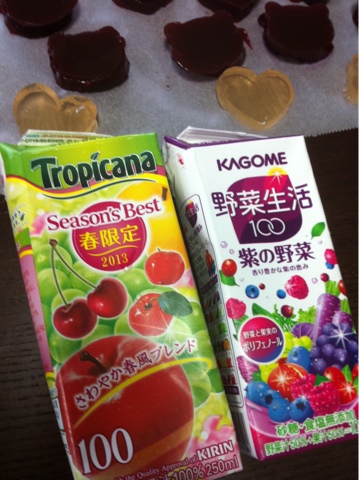
We went to the grocery store in the morning, before the weather got too bad and I had him pick out two juices with which to make our jellies. He ended up going with a fruity blend, as well as his favorite vegetable juice. I was personally leaning towards tangerine or maybe grape, but he was pretty set in his plan. I bought two of each juice; they were about 200ml each.


Once we got home, we got cracking. K was really excited to make these and helped the whole time. He generally is over it after a while, but not with these! First we put 1 and 1/2 cups of the juice in a pan to boil.


In a separate bowl, we measured out 1/2 cup of the juice into a bowl and addded 2 tablespoons of gelatin. I thought we should stir it, but the gelatin started to melt straight away, so I figured it would be fine.


Once the juice boiled, I added it to the gelatin mixture and K stirred it up. The gelatin dissolved super quickly so this only took about 10 seconds.


Then we got to pouring. Before going to the grocery store, we stopped by the 100 yen shop to get some cookie cutters. K spotted these molds as well and wanted them, so we picked these little guys up too. They were so super tiny, but I figured we could try. The remaining liquid was put into a cake and a pie pan. Then all of them were put into the refrigerator.


Once they were in the fridge, I got to making lunch and by the time we were finished eating, the tiny ones were ready to eat. It was really difficult to get them out of the mold and they ended up not being cute at all.

That being said, K didn't seem to mind one bit.


Once K woke from his nap, I set him loose with the cookie cutters. He liked the bear cookie cutter most of all, so we ended up with a lot of bears. I threw in a few hearts, flowers and bows for good measure.

K definitely helped himself to the scraps while he was cutting. He kept picking up tiny pieces and asking me, "Mama, it's ok if K eat dis?" "Sure, baby."


You can't tell from the photo very well, but he ended up with jelly all over his face.


Once we got the shapes cut out, I let him go to town on both of scraps and the shapes. Turns out he didn't care which he ate - he just wanted his jellies! He told me that he liked the vegetable juice one more than the fruit juice one. I was quite surprised, because the vegetable one wasn't nearly as sweet. Not that either of them were too sweet, given that we didn't add any sweetener. Next time, I think I might add a bit of honey to the vegetable juice. While K liked it, I would have enjoyed my jellies a tad bit sweeter.


Thursday, March 14, 2013

Preschool Prep 3

 
My last post was about K's lunch bags for preschool. After lunch, the next step is for the kiddies to brush their teeth. As a result, I also had to make a bag to hold K's toothbrush, toothpaste and cup.

For this bag, I chose the realistic Shinkansen fabric (for those of you in the know, it is actually プラレール fabric). K's two favorite Shinkansens are Dr. Yellow and Hayabusa. I made sure the part of the fabric that I chose for the bag had those two on it.

 
I wanted a drawstring bag, and used a pattern from a sewing magazine for the basic idea. The bag in the magazine, however was not lined. I really wanted all of the bags to have the same white and green lining, so I had to make some adjustments.

This bag  was super easy to make and would have been even faster without the lining. Start by cutting the outside and lining fabric. I just just cut a long rectangle for each. Then fold the rectangle in half and sew from the folded edge up the side, leaving a bit of space for the drawstring. Do the same on the other side and for the lining.


Then square off the corners of both the lining and outside fabric.


Next stitch down the seam you left open at the top of the bag. Do this for all four of the open corners. This will keep the fabric from becoming all messy with the drawstring.


Then just put the lining inside the main fabric, fold the top edge down twice making sure there is space for the drawstring to go through and topstitch it down. After doing this, I realized it would have been a bit better (but slightly more complicated) to cut the lining a tiny bit shorter so that you wouldn't have so much bulk in the folded over bit. It's not a big deal, but might have been easier to pull open and shut.


For the ends of the drawstring, I wanted to use the dotted fabric to keep the knots from coming loose. I sewed two tiny rectangles and once I got the drawstring through the bag, I tied a knot and then sewed a rectangle around each knot.


If you were to do this, I would definitely recommend using a zipper foot. It was quite bulky and caused a few problems with my walking foot.


Here is the completed bag with K's cup, toothbrush and toothpaste. Once all of these bags were done, I asked K which was his favorite, totally expecting him to say the Thomas ones. Lo and behold, he claimed this as his favorite. I felt so bad since this is the smallest bag. I should have guessed that this would be the winner due to his favorite Shinkansens being featured. Boo.


Luckily, I still had to make him two towels for cleaning himself off. I cut out one Hayabusa and one Dr. Yellow and appliqued those trains onto the towels. Just a note, if you have to make some towels for some reason, use a straight stitch. If you look closely, you will notice that the top towel is really wavy - I used a zig zag stitch to top stitch and it made a mess. The bottom towel was straight stitched and turned out much better.


At this point, I was nearly done with K's school preparations. All that was left was to sew a ribbon into the tag of his raincoat so it can be hung up easily. The raincoat also needed elastic in the sleeves. Both of those were really quick to do up. I also had to move the buttons on his suspenders so that they would actually try to hold his shorts up. When buying the (quite pricey) uniform, the teacher helping me told me that almost everyone buys a size large so that the kids can wear them until they graduate kindergarten - for K that will be in four years!


K is skinny to begin with, so I knew the large was going to be massive on his waist. I took the waist in a bit as well to help them stay on his skinny, little body.


The final step was to shorten the sleeves on his jacket. Again, as a large, it is pretty massive, but I couldn't do much to fix it aside from this.


The sleeves fit much better now, but the chest is still huge. Oh well, maybe he will grow into it over the next four years??

 
The final step in getting him ready is to label EVERYTHING. I am going to let Y do that! I am done. Now I get to focus on some projects for me. ;)

Tuesday, March 12, 2013

Preschool Prep 2

 
As I wrote about yesterday, K starts twice-a-week preschool next month. The school day lasts from 9 to 2, which means he will eat lunch at school. Once a week he will have the school lunch and once a week I'll make him his lunch (bento).

Because of this, I had to make his bento bag, as well as his cutlery/apron bag. I decided Thomas fabric for both bags would be cute.

K's school is quite lax in exact sizes and styles, they just ask that the bag be a bit bigger than necessary as kids sometimes struggle if the fit is too perfect. I had no idea what style bag to make, so I asked one of my best friends here what she did for her children. Their school has much stricter guidelines and even provides a pattern, which I ended up using. It was so simple!

Start by cutting two squares/rectangles of the same size - one for the outside and one for the lining. Round two of the corners (the rounded edge will be for the flap). Sew the opposite end together, fabric right sides facing.


Then flip the fabric over, so the wrong sides are together and top stitch over the seam you just made.


The trickiest bit of this bag comes now. Holding that seam, pull the rounded end of the fabric up, creating an overlap - this will be the pocket. You have to fold each side up so that the right sides are facing again. If you were to spread your folds apart, you would end up with a "W" shape. Make sure you have it all lined up perfectly, pin and sew a seam from the folded pocket part, up around the rounded corner and onto the top of the flap. Stop an inch or two from the middle. Then continue leaving a couple of inches for turning, all the way down to the other side of the folded pocket.


This is what the folded pocket part looks like after sewing, but before flipping.


When you flip the bag right-side out, you have a perfect little pouch with a flap. The next step in the pattern is to fold the bag so the lining is showing and square off the corners. Depending on what you plan to use this pouch for, however, this step isn't even necessary. The final step is to add a velcro closing. Just sew the soft half to the top of the pocket and the bumpy half to the top of the flap.

I wanted to use the dot fabric somehow and I thought the bag was a bit lacking, so I cut out two rectangles of the dots to add a little bit of excitement to the flap. I sewed the velcro onto one of the dotted rectangles. I also added a bit of interfacing to give the rectangle some strength. Then I sewed them together, halfway up the short ends.


Next I sewed the rectangle onto the middle of the flap. Finally, I cut out one of K's favorite trains, Gordon, and appliqued him onto the outside rectangle.


As I mentioned yesterday, every item they take to school needs their name on it. I added the name tape and the bento bag was done!


Next up was the cutlery and apron bag. I found this style of bag to be simple to make, so used the same idea to make the second bag. I made this one slighly longer since the cutlery case is a tad on the long side. Also, instead of Gordon I appliqued Hiro (another favorite) to the flap of this bag.


K seemed pleased with these bags as well and keeps wanting to use his new bento box. He likes practicing putting the bento box in and taking it out. I let him practice a bit for a day or two, but then I decided to take them away as they are for school - one more thing for him to get excited about seemed like a good idea.

 
Bentos are a big deal here and lots of moms go all out making them cute for their kids. I totally plan on doing this, but I am a tad worried about how to do it/making them look cute, but not too cute. Also, I really have no idea if K will even eat cute food - he is really quite funny with this food. On Saturday we went to the bookstore and I bought two bentos-for-kindergarteners books. They are SO CUTE! I figured it would be a good idea to see how K would react to cute food, so on Sunday I made him a cute-ish lunch.
 
 
He was stoked on the mini hotdogs and onigiri, but a bit hesitant on the quail eggs. That being said, there are a million cute things to do with quail eggs - I think I'm going to keep pushing them! He ended up eating one, but gave the rest to me. I also gave him carrot sticks and a banana, but they weren't cute, so I didn't take a photo of those bits. Eeek! The possibilities for cute bentos is so super exciting to me. I'll likely post about them once they start up (probably not until May, as he has mostly half days until then). I'm so excited!!