Tuesday, April 22, 2014

K's Baking Party: Aprons


K will turn 4 on April 30th. When we were first told that Y was getting transferred to the US, the expected departure date was March 26th. Because of that, I had planned on doing K's birthday party at my parents' house since he has a few friends in their neighborhood and also I imagined my brothers and sister would gather to make it a fun event for him. We found out in mid-March that we wouldn't be going until May 1st (which is likely going to get pushed back again, but who knows). We told that to K and the first thing he said was, "Yay!! Now we get to have my birthday party with my friends!" With such excitement, I knew that while it was going to be a bit rushed and thrown together, I had to work out a party for him. Although it was a tad early, we held his party this last Saturday and it was a blast!

I asked him who he wanted to invite and he came up with a list of 10 friends and his teachers. With the friends, their parents, our family and K's teachers, the attendee list was up to 30 people. This was his first party where the invite list was solely his doing. He's growing up!! Given that I was going to have to do preparation for the party while packing up the house, I wanted to keep it fairly simple this year. I racked my brain thinking of what the party theme should be when it hit me - K loves to bake with me! A baking party complete with aprons for the kids would be so cute.

I looked online for a simple (remember I was a bit pushed for time) pattern and found this one. I love that it just slid over the kid's head and then fastened with velcro - simple enough for a three-year old to put on by him/herself, but still definitely fits the apron bill. I also liked that they were lined, more coverage between food and clothes. While most of K's friends are still three, there were a few that were older, a five-year old girl, a six-year old girl, and a nine-year old boy. I was a bit unsure of sizing, so after we went shopping for fabric (more on that in a minute), the first one I made was the bigger size in a girl fabric hoping it would work for one of the older girls. I tried it on K and it was a tad bit big, I imagined the smaller size would fit him and the other three and four-year olds without any problems - perfect!

 
Once that first apron was done, I spent a night cutting out all of the aprons and pairing them up - main to lining fabric. Since there were 10 of them to cut, this took a good amount of time. I also cut out all of the elastic and velcro. All that was left was for them to be sewn up.
 
Of course, before even starting the apron-making process, I had to get the fabric. I decided that K should pick out whatever he wanted for the aprons. I often go into the shop with that thought: "K can pick out whatever fabric he wants for his pants, shirt, etc." but when it comes down to it, I find that I influence his choice a bit more than making it a "whatever K wants" kind of thing. This time, it truly was whatever K wanted. I told him that we should pick three fabrics for the boys' aprons and two for the girls' aprons, since I could get two aprons out of each fabric. For the boys he picked a Shinkansen fabric, a Thomas fabric and a Mario fabric (which was slotted for his apron). I also got a linen for the oldest boy, as I was pretty sure he wouldn't quite appreciate a Thomas apron. All of the girls were going to get Hello Kitty. I suggested also getting a Disney Princess one to mix things up a bit, but he was pretty set on all Hello Kitty. I asked him if he wanted to pick the lining fabric, but he said he didn't care so long as his had yellow for the lining. I ended up getting yellow, red and green for the boys, and pink and lavendar for the girls. I paired the fabrics up so that each of the patterned fabrics would have a different color for the lining, i.e. the first Mario apron had a yellow lining (for K) and the second one had green. I mixed the girls' linings by size - each size had a pink and lavendar lined apron.
 

The pattern itself is really quite simple. I got all of the remaining 10 aprons sewn over two nights. At the party, there were a few kids that didn't want to wear them, which was obviously fine. Most of the kids, however, seemed to really like them. I've gotten emails from a few of the moms saying that their kid loves it and now wears it all the time at home. Cute!! K LOVED his - Mario plus yellow is a definite win in his book. Hopefully I will write more about the party every day this week. No promises as nights have been a bit rough in this house - T is learning to walk while holding things and has decided that practicing is more fun than sleeping. Great.

Monday, April 14, 2014

Good-Bye Lemon Meringue Pie


Last Christmas, you may recall that we had some friends over for a big Christmas dinner. I think it was the night before the dinner that I broke the news that we were moving to my friend, S. He and his family were one of the families that came over for dinner. I thought that telling him before the dinner would make things smoother, given that it seemed like too big of news for it to casually be mentioned over dinner. Also S is a total drama queen. I called him up and told him on the phone, to which he responded, "this isn't the type of news you tell before Christmas - this is Boxing Day news!" Whoops. While at our house for dinner, he said that we would be forgiven for leaving so long as I promised him a lemon meringue pie before we left. Deal.

The only problem is that while we are such close friends, we really don't meet up too often. We live far away. They have a little girl and an older son, and I have K and T. S is in a band and that takes up many of his weekend nights. The list goes on, I'm sure. Luckily, my good friend, B, suggested that the old crew get together for a good-bye party and everyone graciously came to ours for it - thanks, guys!! With T, being out at night is a bit of a struggle. It was so nice to be able to just put him to bed when he started to lose it. It was also nice to have everyone over so we could work our way through our alcohol. Since everyone was coming over, S included, I decided it would be the perfect time to make the pie. I was all excited about it and was hoping he would be so stoked and pleased that I had remembered our deal. He arrived and I told him I made the pie and he had absolutely no recollection of the pie promise. Thanks, S!! That being said, who cares?! Lemon meringue is one of my favorites as well, so it was perfect.

It's such a simple pie, so it was pretty perfect for the occasion - I am at the point where things just need to get done. I started with my standard 3-2-1 pie crust. Mix 210g of flour, a bit of salt and a bit of sugar in a bowl. Chop up 140g of butter and mix it in with yoru fingers until it is all crumbly. Mix in water, roughly 70g, but do it slowly - I never end up needing all 70g. Then form a ball, flatten it a tad, wrap it and refrigerate it for a bit. Roll it out, pop it in a pie pan, and poke with a fork. Then bake it for about 10 minutes at 450F.

With the leftovers, I do what my mom always used to do. Roll them into a square, dot it with butter, sprinkle on cinnamon and sugar, roll it up, cut into little spirals. Then I bake them with the crust. They end up like delicious little cinnamon sugar cookies.


While the crust is cooling, get to work on the meringue and lemon filling. Before you start anything, get all of the ingredients ready, you have to move fast for this one. For the meringue beat 3 egg whiles, 1/2t vanilla, and 1/4t cream of tartar until frothy. Gradually add 6T of sugar and beat until hard peaks form. Set it aside and quickly get the lemon filling made.

Mix 1 1/2c sugar, 3T cornstarch, 3T flour and a dash of salt in a saucepan. Gradually add 1 1/2c hot water while stirring constantly over high heat until it boils. Reduce the heat and cook for 2 more minutes, stirring the whole time. Remove it from the heat.


In a medium bowl, lightly beat 3 egg yolks. Stir a tiny bit of the above mixutre into the yolks to temper them, then add them to the saucepan. Bring it to a boil again and cook for 2 more minutes, stirring constantly. Take it off the heat, add 2T of butter and 1/2t of grated lemon rind. Slowly add in 1/3c of lemon juice. Mix it up really well.


Pour it into the pasty shell. Then cover it with the meringue. If it took too long to make the filling, the meringue may have separated. This isn't ideal, but just try to beat the meringue back into shape. Finally, put it in the oven and bake for 12 minutes at 350F. Let the pie cool before cutting or else you will have a soupy mess on your hands.

I'm not sure why I didn't take more photos of the finished pie. In fact, I am pretty sure that I did, but I can't seem to find them on my phone. Perhaps I used Y's phone and forgot? Regardless, rest assured that this is both a beautiful and delicious pie. Most certainly one of my favs.


Friday, April 11, 2014

Bunny Bibs


Our move is coming up soon - I know I keep saying that, but it's true - so I was going through my phone making sure that I have uploaded photos of past projects in case they somehow get deleted. Yes, I am super paranoid about something awful happening to my phone. As a result, I found these bunny bibs that I made for my niece ages ago. I adore them so super much!

I started by drafting a pattern for them using a bib that fit T well at that time. It was actually a bib that a friend had made for T before he was born. I love it!


I started with that general shape and size, but then tweaked it to get a bunny shape. I was planning on (and did) connect the ears with a ribbon, so they didn't have to go in towards the center too much.


After cutting out my face fabric, all double gauze, I embroidered their little faces on. I did the outline of the inner ear, eyes, a mouth and I used a scrap of fabric for a little nose, emroidering that on as well.


Here is a close-up of one of the faces. After getting the face done, I basted on the tying ribbons.


For the underside of the bib, I used an organic terry cloth. I sewed it on and then cut around the curves - pretty much the entire bib.


Finally I flipped them right side out and top stitched around. I love how these turned out. I haven't actually seen them on the baby to make sure the fit is good, so I am not 100% sure on them. I don't know why I didn't think to try them on T, as T and his cousin are less than four months apart.
I remember when I made them this one was my least favorite. I don't know if it is the color of the fabric or something in how I did the face, but compared to the others it just didn't look as cute to me once it was finished.


I liked this one quite a bit.


But this flowered one was my favorite. Looking at them now, however, I ADORE the colored dots on cream bunny. I think maybe the way her face stands out looks so sweet to me.


T is eight months today, which means his little girl cousin is nearly 5 months. Maybe she'll get teeth soon and be all slobbery? Maybe she'll be starting solids soon? Hopefully these little bibs will get some use on that little cutie! I hope her mom and dad love these little bunny bibs as much as I do.

Tuesday, April 8, 2014

Chocolate Cake with Neopolitan Swiss Meringue Buttercream


As we will be leaving Japan in a few weeks, we have had a number of goodbye parties. One of them was with our two closest families in the neighborhood. We rented a room in our condo and all of us - six parents and six kids - spent hours together hanging out, talking, eating delicious foods, and watching our kids play. It's crazy how big they have gotten. The first time we hung out, K was about Touji's age and the oldest kid was only about two. Now K is almost four and the oldest will be six this summer.

For the party, I wanted to bring a cake. I started with my standard chocolate cake recipe, baked in two tins and then sliced in half giving me four cake layers. Since the actual cake was so simple, I wanted to do something kind of fun with the frosting. I went through about 10 different ideas before settling on a Neopolitan-style frosting. I started with a vanilla Swiss meringue buttercream. Then I roughly divided that into three and got my chocolate and strawberries ready. For the chocolate, I just melted it and for the strawberries, I just pureed them with my immersion blender.


Little by little, I added both the (cooled) melted chocolate and strawberry puree to the bowls of buttercream. I was shocked at how delicious the chocolate ended up being. The consistency changed a bit, but man alive, was it amazing.


I got the cake ready and put a thin layer of frosting between each of the cake layers - cake, vanilla buttercream, cake, strawberry buttercream, cake, chocolate buttercream.


Then I crumb coated the cake with vanilla.

 
Once it was hardened, I went to frosting the cake - starting with the vanilla at the bottom of the cake, then moved to the strawberry for the middle, and chocolate at the top.


Finally using the back of a spoon, I swirled the frosting a bit and mixed the colors together. I wanted it to be reminiscent of the pastel cake I made ages ago, but it didn't end up looking nearly as pretty as that one. 


That being said, it tasted pretty delicious, so I guess it all worked out in the end.


Yum!!

Friday, April 4, 2014

Mug Bag


Y started working in a new office as of the New Year. He decided that instead of buying tea or coffee after he finished his travel mug of coffee, he should just take a mug to work and make some there. He didn't want the mug to get the inside of his bag dirty, so he asked if I could make him a bag to carry it. I was thinking about the best way to make one, when I remembered that I made a mug bag for K to take his toothbrush, toothpaste and rinsing mug to kindergarten. I tested that bag on a regular mug and it fit. Perfect!

I wasn't too worried about his bag getting dirty, I was more worried about the mug breaking. So, the first thing I did was sew batting to the lining fabric. I left an inch or so at the top with no batting to make the drawstring bit less bulky.


Since I didn't have enough of the main fabric to cut out one long rectangle, I cut two squares and sewed them together at the bottom to make a rectangle.


Then I sewed up the sides on both the lining and outside fabrics, leaving an inch or so at the top, on both sides, unsewn.


Next I squared off the corners on both the lining and outside fabric. They look like little ears - cute!


Then I sewed the top of the side seams down so that the bag won't fray from the drawstring.


Next I put the lining into the outside fabric, with the lining on the outside, wrong sides together. Although I don't think it's necessary, I was super paranoid about not getting the top bit done well, or even worse having it come apart, so I zig zagged the bags together at the top.


Then I folded the top down twice, and sewed it closed.


Finally, I turned the bag right side out, cut two ribbons of equal length and strung them through the top drawstring. The final step was to pop a mug in there and make sure it fit.


Then I took photos and sent them to Y since he was at work when I made it. He loved how it turned out. It was such a simple bag to make, but I think it's super cute! Yay for clean bags and unbroken mugs!

Thursday, April 3, 2014

Bento Thursday - Ohanami


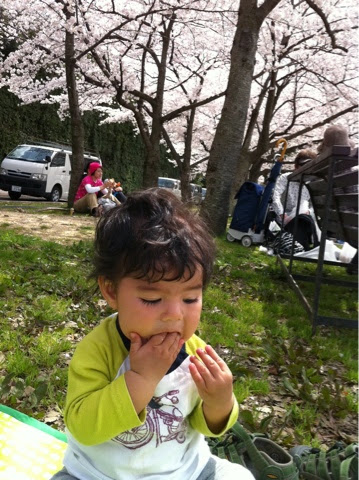
Right now is my favorite season in Japan - the cherry blossoms, sakura, are out! During cherry blossom time, we often have Ohanami, picnics under the flowering trees. One of the room mothers for K's kindergarten suggested we get together for Ohanami on Monday. I asked K what kind of bento he wanted - Dr. Yellow, naturally. This time, to mix it up a bit, I boiled an egg, took out the yolk, mashed it up and mixed it into his rice to make it yellow. I love how it turned out. Then I added the standard nori windows and stripes. He also requested cucumbers, carrots, green peppers and teriyaki chicken. I got it all ready, showed it to him and he was bummed that the stripes on Dr. Yellow weren't blue like they are supposed to be. I have never done them blue. I ended up getting out my food markers and drawing blue stripes on it. He was so pleased.

My bento was the same as K's, except for the onigiri. I wanted a sesame onigiri, so I made it into a bear. 


Since I was making bentos for K and I, I figured I might as well make one for Y. I left out the cucumbers from his and instead added cheesy salmon and tomatoes. Also, no onigiri - just rice with furikake.


K had such a fun time with his school friends. Only about 10 of them showed up, but a few of them were his best friends. In the morning it was a tad chilly, but it ended up getting quite hot.


Unfortunately, we had to leave a bit early. T was getting restless, we had to get to the bank by 3, and I wanted to pick up Y's birthday present. K was cool with leaving, but asked if we could go back one day.


Just before T was born, I had this huge urge to take K out and do as many fun things with him as possible, while it was just the two of us. Now that we leave in less than a month (probably), I am feeling the same way. During the time we have left, I want to do as many fun things in Japan as possible. So this morning, I made K and I some sandwiches, cut up some carrots and apples, and packed a lunch for T. We stopped by the convini to pick up some treats for after lunch, then we popped on the train, and headed back to the park we went to on Monday. We got there just after 11 and the place was packed. Luckily we found a nice spot in the shade. T tried to eat everything he saw.


K stuck to his sandwich, carrots and apples.

After lunch, we took a walk around. K played at one of the playgrounds, but then he spotted the gigantic bouncy castle. He always asks to play in it, but we always have some excuse. Not today! In the spirit of making his last month in Japan epic, I bought him a ticket. He was on cloud 9. Kids go in for 15 minute shifts. He made the most of his time in there - climbing the walls, running and jumping off of the tubes, going down the slides, and jumping as high as he could propel his little body. He came out glowing (maybe from sweat, but likely from the amazing 15 minutes he spent in there).


He was really hot at that point, so I suggested we get some ice cream - also, to be honest, I can't go to this park during cherry blossom season and not get a cherry blossom ice cream. Ugh. It's amazing.


K took ages to eat his ice cream. Usually I would try to hurry him up, but why? I had to get home to make dinner, but tonight was mostly left overs anyway. K took so long eating it that T fell asleep.


As we were walking to the station, K looked up and said, "Look, mama! We are in a tunnel of sakura!" We were. And it was beautiful.


K had such a fun day and I am so happy. Yesterday we walked out to the gardening store near our house and K fed the fish. Tomorrow his friend from school is coming over. He has been asking to go to a professional soccer game, and I think there is one this weekend. I am debating taking him. It starts at 4, so it will mess up T's bedtime, but part of me wants to just not worry about that and take them anyway. Afterall, I want K to have wonderful memories of Japan. I know we will be back, but not for a few years.

Tuesday, April 1, 2014

Happy Birthday, Y


Today my wonderful husband, Y, turns 34! Holy moly!! I could gush on and on about what an awesome husband and dad he is, but he knows that already. Instead I will write about his birthday cake.

Ages ago, I saw these strawberry cream-filled Oreos at the grocery store and have wanted to buy them ever since. But, I hate buying sweets because I also make sweets, which means I end up with TONS of sweets in the house and that is probably the last thing I need. If I use them for baking, however, I figure it's okay. Since Y loves cheesecake and I always use Oreos as my base in chocolate cheesecakes, the situation ended up being perfect - I get to buy my strawberry Oreos and Y gets his cheesecake.


I started by crushing up the Oreos. The cream is pink and looks so cute!


Then I mixed up the cream cheese cake batter.


Then my mixer's engine broke.


I had to mix in the eggs by hand. Bakers in the past must have had wicked muscles, because that was not easy.


But, it got done and I popped it in the oven. I knew that I wanted the top to be plain, so I was careful about rotating the cake and also baked it in a water bath. I think I ended up baking it for one hour and 25 minutes, but it might have been slightly longer.


It came out pretty perfect. I poked one hole in the middle to make sure it was done enough. I figured it wouldn't be an issue since I would put candles in it for Y. As it turns out, his birthday cake presentation was pretty lame. While his birthday was today, he leaves on a business trip tomorrow. I woke up, cut a piece of cake for him and put it in a tupperware, along with some whipped cream and strawberries, for him to take to work. No candles or Happy Birthday Song at 7 in the morning. I'll put another piece together for him for dessert, but then the rest is left over. Anyone need some??