Showing posts with label Recipe. Show all posts

Monday, April 14, 2014

Good-Bye Lemon Meringue Pie


Last Christmas, you may recall that we had some friends over for a big Christmas dinner. I think it was the night before the dinner that I broke the news that we were moving to my friend, S. He and his family were one of the families that came over for dinner. I thought that telling him before the dinner would make things smoother, given that it seemed like too big of news for it to casually be mentioned over dinner. Also S is a total drama queen. I called him up and told him on the phone, to which he responded, "this isn't the type of news you tell before Christmas - this is Boxing Day news!" Whoops. While at our house for dinner, he said that we would be forgiven for leaving so long as I promised him a lemon meringue pie before we left. Deal.

The only problem is that while we are such close friends, we really don't meet up too often. We live far away. They have a little girl and an older son, and I have K and T. S is in a band and that takes up many of his weekend nights. The list goes on, I'm sure. Luckily, my good friend, B, suggested that the old crew get together for a good-bye party and everyone graciously came to ours for it - thanks, guys!! With T, being out at night is a bit of a struggle. It was so nice to be able to just put him to bed when he started to lose it. It was also nice to have everyone over so we could work our way through our alcohol. Since everyone was coming over, S included, I decided it would be the perfect time to make the pie. I was all excited about it and was hoping he would be so stoked and pleased that I had remembered our deal. He arrived and I told him I made the pie and he had absolutely no recollection of the pie promise. Thanks, S!! That being said, who cares?! Lemon meringue is one of my favorites as well, so it was perfect.

It's such a simple pie, so it was pretty perfect for the occasion - I am at the point where things just need to get done. I started with my standard 3-2-1 pie crust. Mix 210g of flour, a bit of salt and a bit of sugar in a bowl. Chop up 140g of butter and mix it in with yoru fingers until it is all crumbly. Mix in water, roughly 70g, but do it slowly - I never end up needing all 70g. Then form a ball, flatten it a tad, wrap it and refrigerate it for a bit. Roll it out, pop it in a pie pan, and poke with a fork. Then bake it for about 10 minutes at 450F.

With the leftovers, I do what my mom always used to do. Roll them into a square, dot it with butter, sprinkle on cinnamon and sugar, roll it up, cut into little spirals. Then I bake them with the crust. They end up like delicious little cinnamon sugar cookies.


While the crust is cooling, get to work on the meringue and lemon filling. Before you start anything, get all of the ingredients ready, you have to move fast for this one. For the meringue beat 3 egg whiles, 1/2t vanilla, and 1/4t cream of tartar until frothy. Gradually add 6T of sugar and beat until hard peaks form. Set it aside and quickly get the lemon filling made.

Mix 1 1/2c sugar, 3T cornstarch, 3T flour and a dash of salt in a saucepan. Gradually add 1 1/2c hot water while stirring constantly over high heat until it boils. Reduce the heat and cook for 2 more minutes, stirring the whole time. Remove it from the heat.


In a medium bowl, lightly beat 3 egg yolks. Stir a tiny bit of the above mixutre into the yolks to temper them, then add them to the saucepan. Bring it to a boil again and cook for 2 more minutes, stirring constantly. Take it off the heat, add 2T of butter and 1/2t of grated lemon rind. Slowly add in 1/3c of lemon juice. Mix it up really well.


Pour it into the pasty shell. Then cover it with the meringue. If it took too long to make the filling, the meringue may have separated. This isn't ideal, but just try to beat the meringue back into shape. Finally, put it in the oven and bake for 12 minutes at 350F. Let the pie cool before cutting or else you will have a soupy mess on your hands.

I'm not sure why I didn't take more photos of the finished pie. In fact, I am pretty sure that I did, but I can't seem to find them on my phone. Perhaps I used Y's phone and forgot? Regardless, rest assured that this is both a beautiful and delicious pie. Most certainly one of my favs.


Friday, November 22, 2013

Sweet Potato Snackies


Today K went on a field trip to the zoo. (For those who are curious, this week, he went to school like a champ - very little crying and puke-free!!) For field trips, the kids have a special backpack that is a bit smaller than their regular one. As a result, while he needed to take a bento, it had to be a small bento (generally just onigiri or a sandwich) and not even in a bento box, but wrapped in foil. They were also instructed to bring a snack. Since K's onigiri contained no fruits or veggies, I thought I should make a snack that had some sort of vitamins in it. I realize these are not healthy in the least, but they do have sweet potato in and that has to count for something, right?

Start by steaming 400 grams of sweet potato. I use a tagine for this, but anything works. You could probably even do it in the microwave, but I've never tried that.


While the sweet potato is steaming, put 70 grams of sugar, 30 grams of fresh cream, 70 grams of milk, 50 grams of butter, and one egg yolk into a pan.


Once the sweet potato is soft, peel and mash it.


Add the mashed sweet potato to your pot and mix it up with the heat on medium. Keep cooking it like this until the liquid is gone and it starts to get kind of stiff.


Put it into a bowl, cover with plastic wrap and put it in the fridge for about an hour or until it is cool enough to handle.


Once it has cooled down, divide it into fairly equal portions, I got 12 out of it, but the original recipe said you could probably get 15. Put each little ball in a foil wrapper.


Form each little portion into an oblong shape. I don't know why we do this, but these treats are super popular in Japan during the fall and they are always this shape. I like to think it's because it looks kind of like a sweet potato (or a football?? Both equal fall to me.). Once they are all formed, crack open another egg and separate the yolk. Mix the yolk up a bit and use your finger to put some on the top.


Then bake them for 15 minutes at 200C. They should have a few brownish spots on them. If not, put them back in for another 2 minutes or so. Then eat! K begged for one of these after dinner last night, and of course I gave him one. He absolutely loves them. He was so super stoked to have one at the zoo today - in fact, according to him, that was his favorite part of the day today. What a cutie!

Friday, October 18, 2013

Sweet Potato Cookies


K was invited to a friend's house earlier this week. There were meant to be a total of four little boys - all within 3 months of each other. One of the boys that was invited has egg allergies, so while I wanted to make a treat for the kiddies, I wanted it to be egg-free. Over the weekend, K and Y had gone to the farm and picked sweet potatoes, so we had a lot of them in the house. I found a recipe for egg-free sweet potato cookies - perfect! In the end, however, the boy with the egg allergy ended up not coming. Ah well.

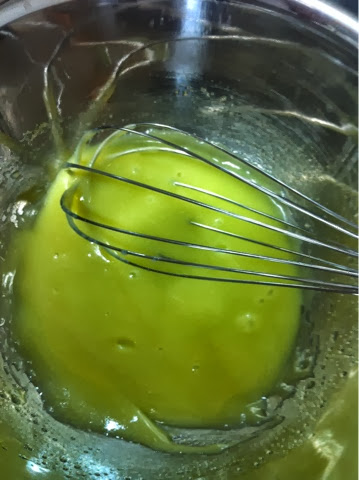
You start by whisking 4 tablespoons of olive oil and 30 grams of sugar.


Then add in 5 tablespoons of sweetened condensed milk.


Whisk it really well.


Chop up 180 grams of sweet potato and microwave it until it is soft - about 3 minutes. Then mash it up.


Whisk the sweet potatoes into the mix.


Add in 150 grams of flour and 5 grams of baking soda.


Mix it with a spatula until a dough forms. Roll out the dough and cut into shapes.

 
Bake at 180C for about 15 minutes. The cookies are quite hard, and while I generally prefer soft, chewy cookies, I still found them quite tasty. Also, eating them made me feel healthy. Maybe not healthy, but better than eating a cupcake, right?!


Friday, October 4, 2013

Chestnut Cookies


At the end of every month, K brings home a new book from school. The back cover of each book has some sort of seasonal food and the mom's book includes the recipe. September's book had a recipe for chestnut cookies. They were super cute and K requested that we make them - so we did! They were a really simple cookie to make (and quite tasty to boot), which was nice so that K could do most of the work.

Combine 100g of flour and a dash of salt in a bowl.


Put 120g of peeled, sweetened chestnuts in a bag and crush them up. (The photo below is pre-crushed chestnuts.)


In a separate bowl, mix 50g of room temperature butter, 1 tablespoon of whipping cream and 40g of brown sugar. Once that is combined, use a spatula to mix in the dry ingredients. Then stir in the chestnuts.


Grab some of the dough, form a ball and then smash it into a chestnut shape - mine are not the greatest... I got 11 cookies out of it all.


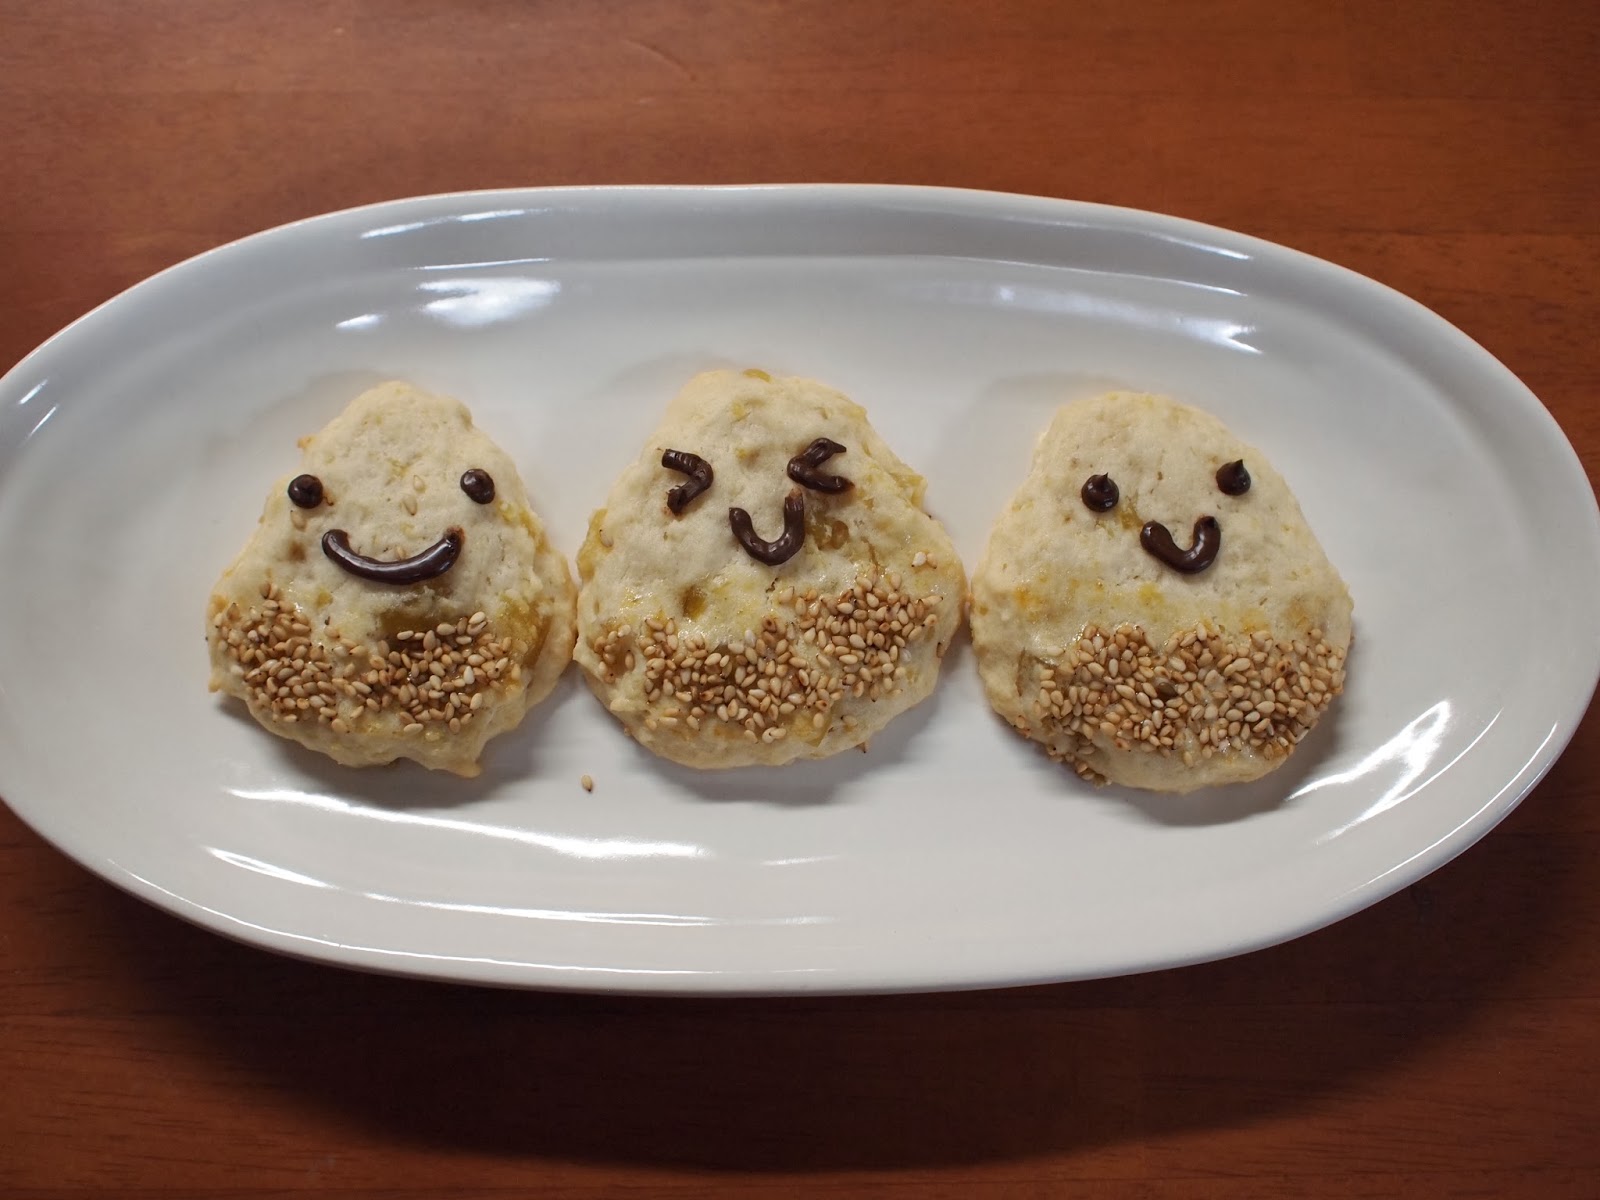
Cover the very bottoms of the cookies with an egg wash and then sprinkle with sesame seeds.


K and I shared the sesame seed step, you can probably tell who did which cookies ;) Then bake them for 20 minutes at 180C.


Once they cooled, I piped little chocolate faces onto them. K loved watching me do this. I asked if he wanted to do some of the faces, but he declined.


He did not decline munching on a few of them though!


Friday, September 27, 2013

Caramel Corn


I want to preface this post by stating that I have been "functioning" on very little sleep. T is up a lot at night. A bonus is that he tends to wake up at about 3 in the morning and it usually takes about an hour and a half to two hours to get him back to sleep. Conveniently enough, K starts rustling about by 5:45 or 6 - granted he has to stay in his room until 6:30, but he is awake and I can hear him moving. Essentially, my days start at 3. Awesome. I blame my lack of sleep on totally spacing to take a photo of the finished product - delicious caramel corn.

It has cooled down quite a bit here, in fact I would say that mornings and evenings are cold! The afternoons still get nice and toasty, but there is definitely a fall breeze in the air. I was talking to my mom who was making a batch of her amazing caramel corn and thought it would be the perfect thing to make this week. I don't know why, but caramel corn makes me think of cool weather. So, here is my mom's awesome recipe (I quartered the recipe, so those are the measurements I will share.)

First pop up some corn, yo. Throw some kernals into a non-stick pot and cover it. Set the heat to medium and swirl the pot around every minute or two. Once the popping slows down, turn off the heat and wait for another minute or two.


Measure out 8 cups of popcorn. (The original recipe calls for 8 QUARTS of popcorn, which is 32 cups...yeah, that wasn't going to happen in my tiny oven.)


Put 1/2 cup packed brown sugar, 1/4 cup butter, 2 tablespoons of corn syrup, and 1/4 teaspoon of salt into a pan.


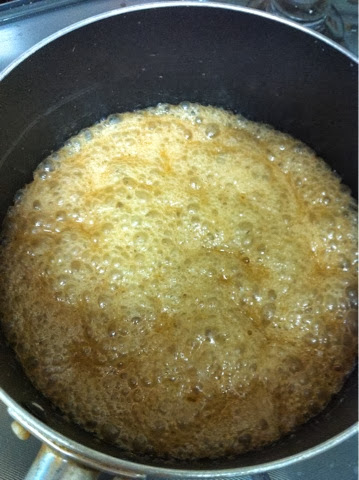
 Bring it to a boil.


Turn down the heat and simmer for 5 minutes. Then turn the heat off and stir in 1/8 teaspoon of baking soda.


Spread your popcorn onto a baking sheet. I split mine between two sheets and put parchment on the bottom.


Pour the caramel sauce out onto the popcorn. Then bake it at 120C for 1 hour, stirring every 15 minutes. Mine didn't get super evenly coated, as you can see from the first photo, but holy moly is it delicious. I took it to a friend's, who was totally bummed because her husband was away on a work trip and she said he would have loved it. I shared some with a neighbor who promptly asked for the recipe. A different friend came over to our house that afternoon and had a healthy helping. There was about a quarter of it left after Y got home from work. He asked if he could have some and it was gone in minutes. Seriously, everyone likes this. If you like caramel corn MAKE THIS!!

Friday, September 13, 2013

Banana Oatmeal Cookies


Going to the grocery store has, quite frankly, become a production. K inevitably wants to ride his bike and I don't feel that T is ready for a stroller yet. As a result, I carry T in a wrap while K speeds around on his bike. He is pretty good about stopping at the "stop points" that we set together way back when I was pregnant, but those points are pretty far apart and now with me carrying T, neighbors continuously stop me to say congratulations and ask after the little one. This means that K gets pretty antsy waiting for me and things fall apart pretty quickly.

I was in the mood for a sweet treat, however, and remembered a recipe that I saw on Facebook for simple, four ingredient cookies - all things I already had in my house. I was a tad skeptical, given that it seemed a bit too simple to actually work and/or taste good. I was pleasantly surprised, as was K.

The cookies start by mashing up three bananas.


Then add a cup of oats and a spoonful of peanut butter (seriously, the "recipe" said a spoonful, not a tablespoon or some other standard measurement, a spoonful - so I just threw some in).


Stir all of that up until it is kind of like cookie batter.


Then stir in a half a cup of chocolate chips.


At this point, I was thinking, "Wow! This might actually work..."


Drop clumps onto a baking sheet and bake at 180C for 13 minutes.


Then pull them out and take a bite.

 
The cookies were good. They weren't your standard super sweet cookie, but that was to be expected. They were, however, quite tasty. The bananas browned a bit in the oven and I feel like they browned even more during the two days it took us to eat them. I didn't mind it, neither did K, but if you are making them to serve to others (these would be great for a peanut-allergy-free playdate), you might want to keep that in mind. I imagine you could play around with the ingredients and just use one banana if you just wanted a few cookies.
 
My favorite thing about the cookies is that really, it's just like eating oatmeal and hence a gives one a perfect excuse to eat cookies for breakfast. 

Monday, July 8, 2013

Tanabata and a Chocolate Roll Cake


Yesterday marked Tanabata in Japan. Tanabata is a yearly festival that celebrates the story of two stars, Altair and Vega, who are lovers yet sadly separated by the Milky Way. They only meet once a year, on July 7. In Japan, we mark the day by writing wishes on papers and tying them to bamboo trees and also, of course, eating star-themed foods. It just so happens that I have been craving chocolate, but eating it gives me gnarly heartburn (thanks, baby in my belly!). I thought about making a chocolate cake instead and seeing if it would be okay - spoiler alert: I ate lots of cake and had no heartburn!! Wahoo!!!

I ended up taking a few different recipes and mixing them together to make my cake.

It started out with 4 eggs, yolks and whites separated, and 42g of flour and 10g of cocoa powder whisked together in a bowl.


Starting with the yolk, add 20g of sugar and beat it for a long time until it thickens up.


Keep beating and it will soon start to look like mayonaisse. That's good.


Make sure to clean your beaters really well (I even wipe them off with vinegar to remove any oily traces), add 40g of sugar to the egg whites, and mix until you get a meringue.


After that you should have the mayonnaise-looking concoction, a meringe and your flour and cocoa powder. Add a half a tablespoon of each water and oil to the egg yolk situation and mix again to make sure it didn't get soft while you were making your meringue.


Add about half of the meringue to the egg yolks and mix them together using a spatula.


Then add in your cocoa powder/flour mixture and stir it up well until it is all combined.


Add in the last of the meringue and gently fold it until most of the meringe clumps are smoothed out.


Finally, put it on a baking sheet and bake at 160C for about 13 minutes.


While that is baking, work on your chocolate whipped cream. Put 250ml of heavy cream in a bowl and mix 30g of powdered sugar and 15g of cocoa powder in a separate bowl.


Start to whip the cream and once it starts thickening up, gradually add in the powdered sugar/cocoa powder mix. Whip it until stiff peaks form and then immediately put it in the refrigerator.


At this point, the cake should be just about out of the oven. Lay out a kitchen towel and sprinkle powdered sugar over it.


Flip the cake out onto the towel.


Sprinkle with more powdered sugar (and some cocoa powder too, if you are so inclined).


Then roll it up and put it in the refrigerator until it is nice and cooled.


While the cake is cooling, I got to work on the stars. I used a white chocolate pen, but melting some chocolate and piping it would probably get you cuter looking stars. I made a few big ones and sprinkled them with gold edible glitter. I also made a few small stars for decoration.


Once the cake is cooled, pull it out of the fridge and gently unroll it.


Quickly spread the whipped cream over the surface of the cake. I probably should have left a bit of room on the edges, but I didn't. Nothing bad happened, just a bit of whipped cream leaked out the sides.


Then gently roll the cake up and put it back in the refrigerator.


The final step is to make the glaze on top and to decorate. For the glaze, you will need 4g of gelatin (slightly dissolved in water), 100ml of heavy cream, 60g of cocoa powder and 100g of each water and sugar.


Start by making a simple syrup with the water and sugar.


Then gently whisk in the cocoa powder, keeping the fire on.


Once you have a nice chocolate sauce, add in the cream and gently whisk again. Once it is all mixed together, turn off the heat, add in the gelatin and gently whisk until it is all dissolved. Let the glaze cool for about 20 minutes.


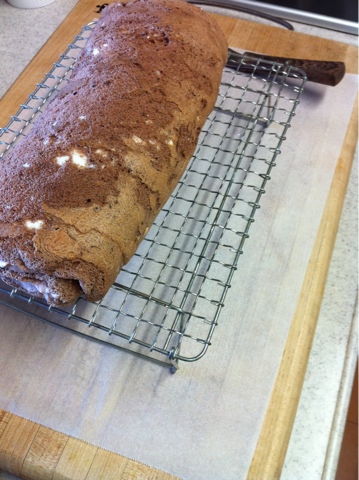
Pull the cake out of the fridge and put it on a wire rack with parchment under it to catch the glaze drippings.


Slowly pour about half of the glaze over the cake, trying to hit all surfaces, sides included. It will start to seep into the cake, but that is fine. Once you have the cake well-covered, put it back in the refrigerator to make the glaze a bit stiff. Then pull it out again and cover the cake with the glaze a second time. This time is should look nice and glossy. Put it back in to stiffen the glaze up a second time. (I didn't take photos of this part because I was in a bit of a time crunch as friends were about to arrive. It really is not too difficult though.)

Once the glaze has hardened a bit, plate it and start the decorating. I started by sifting powdered sugar over the top of the cake to make it look Milky Way-ish.


Then I added my Altair and Vega stars right in the middle of the cake.


I finished with the little stars scattered about.

 
Finally it was ready to slice and eat. 


The cake ended up tasting quite nice. I didn't find it too sweet and yet it had just enough chocolate in it to hit my craving. The whipped cream was the best part, in my opinion. It tasted like melting chocolate soft serve - delicious!

At K's school they had Tanabata Festival on Friday. All of the kids were asked to wear yukata (summer kimono) and the parents were invited. It was so super cute!! All of the little ones in their yukata, singing songs, playing instruments (K was part of the castanet section), and dancing. It was adorable.


The week before the Festival, K's teacher sent home a paper asking us to write down what K wants to be when he grows up. I don't think we had ever had a "occupation discussion" before, but he obviously knows that Y goes to work and has a general idea of what he does there. Given K's love of trains, after bringing up Y's work, I said that there are lots of other jobs, too - train conductors, people who fix trains, people to take train tickets, etc. - and asked what he thinks he would like to do when he gets older. His answer? "I want to fix cars!" Huh, I didn't offer that up as a suggestion given that he loves trains so much more than cars, but if that's what he wants to be then that's great.

I was a bit surprised, but the more I thought about it, it started to make sense. One of my best friends gave K a truck with a drill, nuts and bolts that you can use to take the truck apart and put it back together. He loves it (thanks, Auntie Lisa)! Maybe that is where he got the idea from? Regardless, it was adorable and his little wish was hanging on a bamboo tree when I arrived. So sweet!