Thursday, October 24, 2013
Bento Thursday - Halloween Edition
It was bento day for K today again. Earlier in the week I asked him what bento he wanted and he decided on a Shinkansen bento. Again. But! Yesterday he came from home school and was super jazzed that they were having a Halloween party today. I asked if instead of a Shinkansen bento he would want a Halloween bento and so the ideas started coming. Aside from an onigiri, he wanted asparagus, broccoli, carrots, and nashi. I also threw in some roasted chicken breast.
For the onigiri I started with a ghost cookie cutter and ran it under water so the rice wouldn't stick to it. Then I put it in the bento box and pushed rice into it, then slid the cutter out. I did the face with nori.
Then I put in the greens and chicken where they would fit.
And topped it off with carrots cut to look like Jack-o-lanterns. I LOVE them.
Y's bento was pretty standard - rice with furikake, roasted root veggies, a boiled egg, spinach with tofu, chicken "burgers" with ginger and komatsuna. After finishing K's bento, I still had one Jack-o-lantern left, which I totally could have put into Y's bento. But, I ate it before thinking of that. Sorry babe. Instead I put in heart cut-out carrots that were left over from bento preparation for K's undoukai (Sports Festival) this weekend. The undokai bento is the mother of all bentos and I am stoked for it!!
K got home from school today and as expected he was super excited about the Halloween party. They made black cat costumes, i.e. little ears, and went trick-or-treating, or as K says, "tow rick o tow ree tow," the Japanese version. So cute!
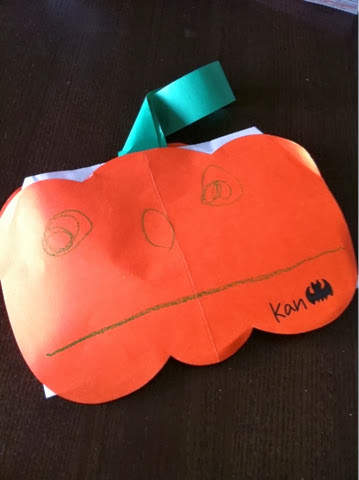
Then he drew a face on two pumpkins and took that around trick-or-treating.
It was full of snacks that the teacher said they could eat at home. He was so happy, which is great because this morning he definitely did not want to go to school. When he came home, however, he declared that "school is fantastic!" That made my day.
Wednesday, October 23, 2013
Halloween - Painted Jack-O-Lanterns
We have just a little over a week before Halloween and I am so excited. I've been doing a lot of Halloween preparation for K's upcoming party, so I figure for the next few days I'll focus on that!! Most of the posts will be fairly short and potential ideas for either little kid party activities, snacks, or decorations for the house.
Since I have moved to Japan, Halloween has gotten bigger and bigger, but it is still nothing like it is in the US. Two of the biggest differences are the lack of trick-or-treating and no real Jack-o-lanterns. That being said, K is going to have his Halloween party at school tomorrow and they will be doing some trick-or-treating, in costumes no less! Since Halloween isn't that big of a deal, kids won't wear their costumes from home (most kids don't even have costumes), but it seems they made costumes at school today. K will apparently be a black cat.
Without a Jack-o-lantern sitting outside our front door, however, something feels strange. I would be all for making one, except for the fact that I have yet to see an actual pumpkin-farm-style pumpkin anywhere here. You can order them from one of the foreign food/items shops, but they are super expensive - like $40 for a medium-sized one. That's not happening. A few weeks ago, however, K, T and I took a walk to the gardening store and found a fairly decent sized pumpkin (yet still not quite big enough to carve) for a reasonable price, so I snagged it! We also found the teeny tiny pumpkins at the grocery store and got one of those.
Since the pumpkin is too small to carve, I thought K could paint a face on it. Luckily I had some black acrylic paint sitting around, as well as some paint brushes so we got to town. We started by planning out the face together. This was K's first Jack-o-lantern, so he didn't really know what type of face he wanted. He decided on triangle eyes and a mouth with teeth. Fairly standard and something he had seen before, no doubt. I painted on the outline and then he did the inside.
I was pretty shocked at what a decent job he did, particularly given that we rarely paint at home. He told me that they do a lot of painting at school - who knew? He is really proud of the big pumpkin. We did the same for the little pumpkin, but as you can see from the first photo it is a bit of a mess. For that pumpkin he requested circle eyes, an oval nose and a mouth with his tongue sticking out. It turns out that painting on the tiny pumpkins is a bit of a challenge.
If you could find cheap pumpkins, this could be a fun activity for a party. The paint didn't get messy, but I suppose you would have to think about age/ability of the kids. It would be such a cute little thing for them to take home. You could even paint on the outlines of the faces before the party, eliminating the planning phase and making the activity a bit faster.Check back tomorrow for Halloween-style bento!!
Tuesday, October 22, 2013
Maple Marble Bread
One of the moms that I meet at the bus stop when K goes to kindergarten, like me, loves her sweets. She, however, is more of a bread-maker than a cake-maker. We decided that when we make something, we would share with one another. The other day she made some chocolate marble bread that was fantastic. She went back to the shop to get more of the chocolate for the marbling, but they were out. Instead she got maple-flavored and gave half of it to me. Today I had a Canadian friend come over, so I figured it would be a great time to bake up these mini breads.
I started with a sweet dough in my breadmaker. Once it rested, I rolled it out a bit and put the maple "stuff" on top.
Then I folded it up to envelope it.
The folding step, as well as the following is the same as making crossaints - roll it out, fold one end over a third of the way and then the opposite end over that, roll it out again, fold it in thirds again, but this time the opposite way.
Do that a few times and soon you have a marbled mess.
This is where crossaints differ. For the marble bread, roll it into a log.
Slice it; the recipe said into eight or 10 slices. I opted for 10 so I could have more of them.
The recipe said to put them in foil baking cups, but I had these adorable paper cups that one of my mom's best friends had sent to me, so I opted to use those instead.
Then bake them and admire your work. The look quite impressive, but were super simple to make.
I've most certainly had my fair share.
They are just so soft, squishy, sweet and delicious - I can't stop myself!
Friday, October 18, 2013
Sweet Potato Cookies
K was invited to a friend's house earlier this week. There were meant to be a total of four little boys - all within 3 months of each other. One of the boys that was invited has egg allergies, so while I wanted to make a treat for the kiddies, I wanted it to be egg-free. Over the weekend, K and Y had gone to the farm and picked sweet potatoes, so we had a lot of them in the house. I found a recipe for egg-free sweet potato cookies - perfect! In the end, however, the boy with the egg allergy ended up not coming. Ah well.
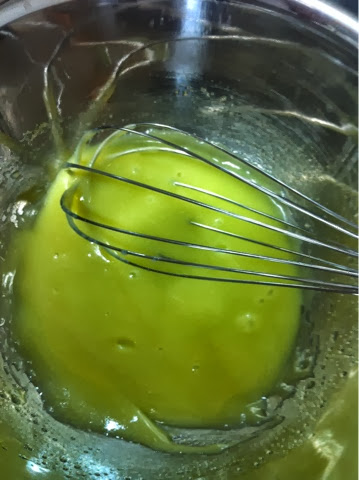
You start by whisking 4 tablespoons of olive oil and 30 grams of sugar.
Then add in 5 tablespoons of sweetened condensed milk.
Whisk it really well.
Chop up 180 grams of sweet potato and microwave it until it is soft - about 3 minutes. Then mash it up.
Whisk the sweet potatoes into the mix.
Add in 150 grams of flour and 5 grams of baking soda.
Mix it with a spatula until a dough forms. Roll out the dough and cut into shapes.
Bake at 180C for about 15 minutes. The cookies are quite hard, and while I generally prefer soft, chewy cookies, I still found them quite tasty. Also, eating them made me feel healthy. Maybe not healthy, but better than eating a cupcake, right?!
Tuesday, October 15, 2013
Yo-yo Barrettes
As you may recall, I teach English to three elementary school girls. I took a break, however, beginning in early August and just started back up this week. One of the girls, however, celebrated her birthday in late August, so I never got her birthday present to her.
Last year, I made her a little slice of birthday cake out of felt. Then it came time to do the same birthday cake slices for the other two girls and I had totally forgotten the exact size and such. It really shouldn't be much of an issue, except two of the girls are sisters - the August birthday girl and a girl with a January birthday. To avoid this issue this year, I decided to just do all of the presents at the same time. As a result, I spent my Saturday night making three sets of yo-yo barrettes.
I started with about a 10cm circle of fabric - two for each set.
To make the yo-yo, fold the edge in just a bit and sew a running stitch close to the fold.
Once it is back to where you started your stitches, pull tight and you have a yo-yo.
Before fastening off, put your needle through the very top of the yo-yo, directly above the last stitch.
Then pull down so it forms the top of the bow. I was thinking of stopping here and making little hearts, but I decided on the bow shape instead.
I couldn't get a good photo of it, but just as you put the needle through the top, put it through the bottom and pull again to get the bow.
Then I wrapped the thread around the center a few more times and finally strung a bead on and placed it in the middle, knotting the thread in the back.
Then do it all over again with the other one.
Finally, I hot glued them onto barrettes. In hindsight, I probably should have secured them to the barrette with a few stitches, but I didn't.
I think they look quite cute. In fact, I think I might whip up a set for myself after Halloween - I've still got Touji's costume to do and a party to prep!!
As above, I made a set for each of the girls. I did them all in different fabrics that I thought each of them might like.
Then I made a little "Happy Birthday" note and clipped them on. Come January, I will be ready!!
Friday, October 11, 2013
Chalk Bag
I know it's been a while since I posted about something I've sewn, but I have actually been pretty busy sewing up a storm. I started with a few projects for my little brother, his girlfriend and my honorary little brother. Then I moved on to some birthday gifts for my little English students (I took a break from lessons, but am starting up again on Monday and one of the girls had her birthday in August), K's Halloween costume, and once that is finished, it is on to T's costume.
So, first up is a chalk bag for my little brother. He celebrated his birthday last month, but he didn't actually recieve his present until Wednesday. Ha! I figured this is probably the last time I get to use the excuse of a newborn in the house, so I might as well take advantage of it ;) My little brother is quite the climber. He goes to the local climbing gym quite often, but also goes on climbing trips. Here he is in Red Rocks.
Quite obviously he has a chalk bag, but in my mind, chalk bags are like handbags - one can never have too many. What if he wants to change it up one day? That being said, it kind of seems like the type of product that once you have one, it seems a bit wasteful to buy another unless it's for a really good reason. To me, that is the perfect birthday present - something you don't need, but want, but don't want to buy for yourself. I looked online and found a surprising amount of chalk bag tutorials. I wanted one that would be fairly big given that my little brother is a dude. Also I lied to him and told him I wanted to make one for Y, and I was curious as to the usefulness of a pocket. He said his has a pocket, but it's pretty useless given that it isn't big enough for his phone. My mission was to make a bag that was on the big side with a pocket big enough for a phone. I found this tutorial and liked the sound of it, I just had to add a pocket.
I started with fabric that was similar to K's backpack, just different colors. I cut everything out and zig zagged all edges - I don't need to deal with it falling apart again.
I also prepped the pocket sewed it to the piece that would be used for the front of the bag.
Big enough for my hand; big enough for an iPhone.
The next step is to sew the outside of the bag together.
Then the inside.
This is where I stopped taking photos. To be honest, I just wanted to get it done. The tutorial, however, is very easy to understand if you have a general idea of what a chalk bag looks like. The trickiest bit is towards the end when you are trying to sew through about 15 layers of fabric. In fact, at the end, I had to hand sew bits of it because I couldn't get all of the fabric under the foot of my machine.
In spite of the thick fabrics, I think it ended up working out well and looking quite cool. As a note, instead of nylon for the belt loops and edge of the bag, I used cotton. I liked the look of it more than the nylon.
I will point out that the back of mine got a bit messy. The outer bag was a bit too big for the linen cover, so I had to put a pleat in the back. Also, as you can see from the photos above and below, the cotton edging isn't seamless, it was simply too thick to overlap that bit.
That being said, I don't think it ruins the structural integrity of the bag, so I imagine it is still safe to use, and from the front you would be none the wiser. The pocket for the phone works as well - Y and my little brother have the same model iPhone, so I could make sure it fit well.
See the phone stuck in there? It's not too snug, but I really doubt it will fall out.
I was on the phone with the little when he opened it and he seemed stoked. He put chalk in it immediately - yay! Hopefully this bag gets to go on many exciting and memorable adventures with my little brother.
Happy birthday, T! We love you and miss you!!
Subscribe to:
Posts (Atom)