Wednesday, September 11, 2013

Ruffle Shorts


Yesterday I posted about the Geranium Shirt that I made for K's little friend. To go along with the shirt, I also made her a little pair of shorts. I wanted the outfit to be matching, but not too matchy matchy that she couldn't wear the pieces separately. The top could easily be worn with a pair of leggings or other pants or shorts, and these shorts could be worn with lots of different shirts.

I used a chambray fabric for the shorts. The pattern I used was Dana's Kid Shorts, which I had in my arsenal of patterns. I used the racer shorts cut, but made them a tiny bit shorter than suggested and then added a little ruffle in the same fabric as the shirt to make up the difference.


The shorts are simple to put together. I zig zagged all of the inside seams so that they would look nice and clean. Unfortunately they didn't look as nice as the inside of the shirt, but what can you do?


Then I added the ruffle. Since it was a gauze fabric, it made such a mess  on the inside.


Once it was cleaned and zig zagged, however, it looked all nice and neat.


The final step was the waistband. I didn't know how big to make the waist, but K is really skinny so given that she is a bit smaller than him, I just used a length of elastic that would fit him and hoped for the best.


I added a little tag to the shorts (the shirt had one too). I say this all the time, but I really just need to get some tags done up. This is getting ridiculous.

 
Here is the completed outfit. I tried it on K (who was none too pleased) to see how it looked and it was adorable. I didn't have the heart to take a photo of him in it - you'll just have to trust me on this. I hope the little girl liked the outfit more than K did!!  
 

Tuesday, September 10, 2013

Geranium Shirt


K's preschool bus picks him up right in front of our condo. There are two little girls that get on at the same spot. One lives in our same complex and is a year older than K. The other lives near us, but in a house and is in his same class. She is quite small compared to K and before preschool began, her mom was concerned that she might cry on the bus. We told K, who was totally confident at that point, that if she cries he should try to help her since he is bigger/older than her. I think he took this as "you need to take care of and look after her at all times." The good news is that he adores her and is always trying to hold her hand and play with her. The bad news is that the feelings are not always recipricated. She often ignores him when he tries to grab her hand and then he gets really bummed. Such is life, right?

Anyway, the little cutie turned three a month and a half ago (!!) and I am just now getting around to blogging about what I made for her. I made this little outfit quite early in case I were to go into labor right around her birthday, (it turns out that did not need to be of any concern), but I didn't want to write about it until after it was given to her. After that, I got pretty lazy about blogging and didn't feel like typing it up. Hence, this week the posts are going to be about a super summery outfit that did make sense at the time, but now seems so out of place given that it is fall.

The Geranium Dress by Made by Rae took the sewing blog world by storm as it seems that the author of nearly every blog I glance at has made at least one of these and they are always so stinking cute. It was my turn now! I love all of the variations on the pattern and that it can be a dress or a shirt. I opted for the shirt and I am in love with it. Since it was summer, I started with a double gauze fabric that I think is so sweet. The first step is to sew up the bodice with the little (optional) flutter sleeves. Eeek! Already it's looking adorable!


The bodice of the shirt is lined. So the next step is to connect the lining to the outside.


Then sew the bottom bit together. I opted for the gathered bottom instead of the pleated, but either works. Also, the shirt has no open seams on the inside which I think makes it look so professional and nice.


See how pretty the inside looks too?


The final step is to connect the bodice to the skirt bit and then add buttons. I found the cutest little pink flower buttons that matched the fabric perfectly. So stinking sweet!


The inside of the shirt is so clean looking. I love it!!

 
I can totally see why this pattern is such a big hit. It is surprisingly easy to put together, so super cute and has many variations. I am hoping she will come out with a long sleeve version so that I can whip up a few for some winter babies!!

Wednesday, September 4, 2013

Pop-Up Book


Yesterday I posted about the chocolate treat that K and I made on the rainy day. Today, again, it was rainy. K had school in the morning, but when he got home it was back to being in the house with not a lot to do. I had asked for suggestions of what to do and one of my good friends suggested making a pop-up book. Hmmm...why not!

I had no idea how to go about making a pop-up book, so I headed to google and found an amazing site that details how to do all types of pop-ups. We stuck to the simplest, the box. While T was napping, K and I got to work.


The first thing I did was ask K to tell me a story while I wrote it down. He LOVED this. In fact, we went through many, many stories. This alone killed about 30 minutes.


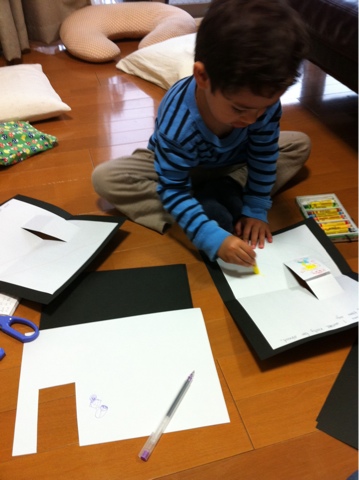
Then he picked his favorite story. I broke it into pages and we prepared the book. K put glue on the computer paper and I stuck it to black construction paper.

 
Using a paper cutter, I cut down the construction paper a bit so it would be slightly smaller than the cover. 
 

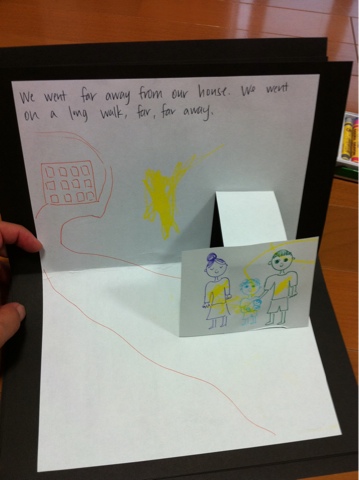
Then we got to making the book! I wrote the story onto the pages and then made two slits with the page folded. Then I folded the box inward to make the pop-up bit. K colored and I drew little illustrations. Man, I need some drawing classes!!


Here's K's first book:


Once upon a time, I walked really for ahead, a really long time ago.


We went far away from our house. We went on a long walk, far, far away.

(I originally drew the pop-up illustration with me holding T. That did not go over well. I had to re-draw it so that K was holding T.)


We went to the convini and bought ice cream. Mama or Touto gives the money.

(He currently is very particular about who pays for things at the shops. Sometimes it's him, other times it's me, every once in a while it's Y. This time it seemed he didn't really care, so long as it wasn't him.)


We walked far away and we came back to home. And we get to our home.


And we take the elevator. The End.

K absolutely loved doing this! He loved the story, he loved coloring (although you may notice he only colors in yellow), he loved having me read it to him. Excellent idea, Miss Melanie!!

I wanted to take a photo of him holding the book and he was being such a monkey about it. He kept covering his face with the book and I would hold the camera above his head, he would move the book, I'd move the camera, this went on for about 3 minutes. He cracked up the entire time.


All in all, it was a wonderful little project to do with the big brother. And now he's an author!

Tuesday, September 3, 2013

5-Minute Dessert


Yesterday was my first day where it was just the boys and me. Until that point, either my parents or Y's mom were with us. On Sunday, Y was of course home with me. Come Monday, however, Y was at work, my parents were in the US and Y's mom had returned to Yokohama where his parents live. Since last week, a typhoon has been trying to make its where here and it has been pretty much constant rain.


Going outside is taking a huge risk given that it might downpour at any minute. On top of the rain, K has come down with a cold. This means, we are stuck in the house. K had been sitting in front of the TV or the iPad for the entire day. When he is sick, he gets special TV/iPad privelages. But, enough was enough - it was time to do something. We were going to make a little treat!

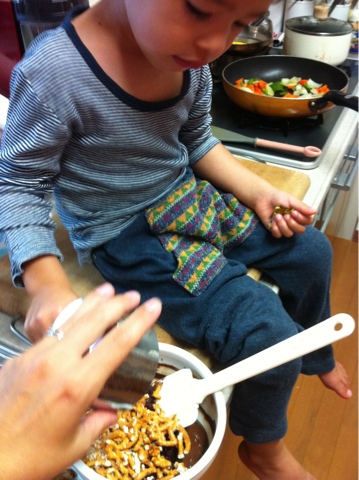
I got K started on crushing up pretzels.


Then we put some chocolate chips in a bowl, added a bit of oil and microwaved it until mostly melted.


Then I stirred it up until it was all nice and smooth.


We added the pretzels and some dried cranberries. It was about 1:1, chocolate to pretzels/cranberries.


Then we put it all out onto a parchment lined cookie sheet and popped it in the refrigerator.


Then we went to the bedroom to take a rest - K with the iPad.


T and I in my bed.


By the time we got up, the chocolate was hard and we had a nice little snack.

It's meant to rain every day until next Wednesday. Any other ideas of what to do with a sick 3-year old and an infant?

Friday, August 30, 2013

Super Simple Baby Blankets


When K was a tiny baby he hated being swaddled. He was also an awful sleeper. Before baby T was born, I was dead set on the fact that he would be swaddled and he would like it. I thought that maybe swaddling T would help him sleep better. So, before T was born, I did some research into what type of blanket is best for swaddling. I know there are specific swaddling blankets, in fact I have a few different ones (that K hated), but I thought for how expensive they are, if the baby hates being swaddled it would be such a huge waste. I would do this the old-fashioned way!

I found that 1 meter by 1 meter is a good size for a blanket and given that it is hot, hot, hot here I thought a thin gauze would be nice. So, before T was born I headed to the fabric store and got 1 meter each of two fabrics.


The blankets were super simple to make. I just washed the fabric and ironed it. Then without measuring, I ironed the edges in twice, about 2.5 centimeters each time. Without even pinning it, I just sewed on the very edge of the fold.


When I got to a corner, I went all the way to the edge of the blanket, turned to follow the edge, turned again at the corner and one last time to make a square.


I think each blanket took less than 15 minutes from ironing to finished product. They look pretty simple, but I wasn't going for anything crazy here. I figured simple would be best.


It turns out T hates being swaddled as well. He might also be the next Houdini. He has broken out of every swaddle I've ever put him in. In fact, he has even broken out of the swaddles when I've used the actual swaddling blankets that I had bought for K. I don't know how, but he got his legs out of the pocket and arms out of the blanket and then had the whole thing wrapped around his waist. It was fairly impressive.

Luckily these blankets aren't a total waste. I use them to simply cover him up or for him to chill on. He seems pretty oblivious to them.


In other news, I have been seeing more and more neighbots recently. The other day as I was taking out the trash, I saw a little neighbor boy and his mom. The mom asked about the T - was it a boy or a girl, etc. The little boy then goes, "Wait! You already had the baby? Why is your tummy still big?" The mom explained that it takes a while for the mom's tummy to shrink back down. I felt like saying, "Listen kid, it's been two and a half weeks. Cut me some slack!"


Wednesday, August 28, 2013

Banana Nutella Muffins - Part 2


Ages ago I posted about some Banana Nutella Mini-Breads that I baked up. They were delicious, but as I mentioned in the post, I totally regretted not swirling Nutella on top. This time I did it and it was definitely worth it!

I didn't take many photos of the actual mixing process because it was the exact same as the previous Banana Nutella post. The recipe was the exact same as well - my trusty Emeril recipe with the odd little adjustment here and there. I froze little Nutella bits for the middle, as I did the last time, and put them in after filling the cup about halfway.


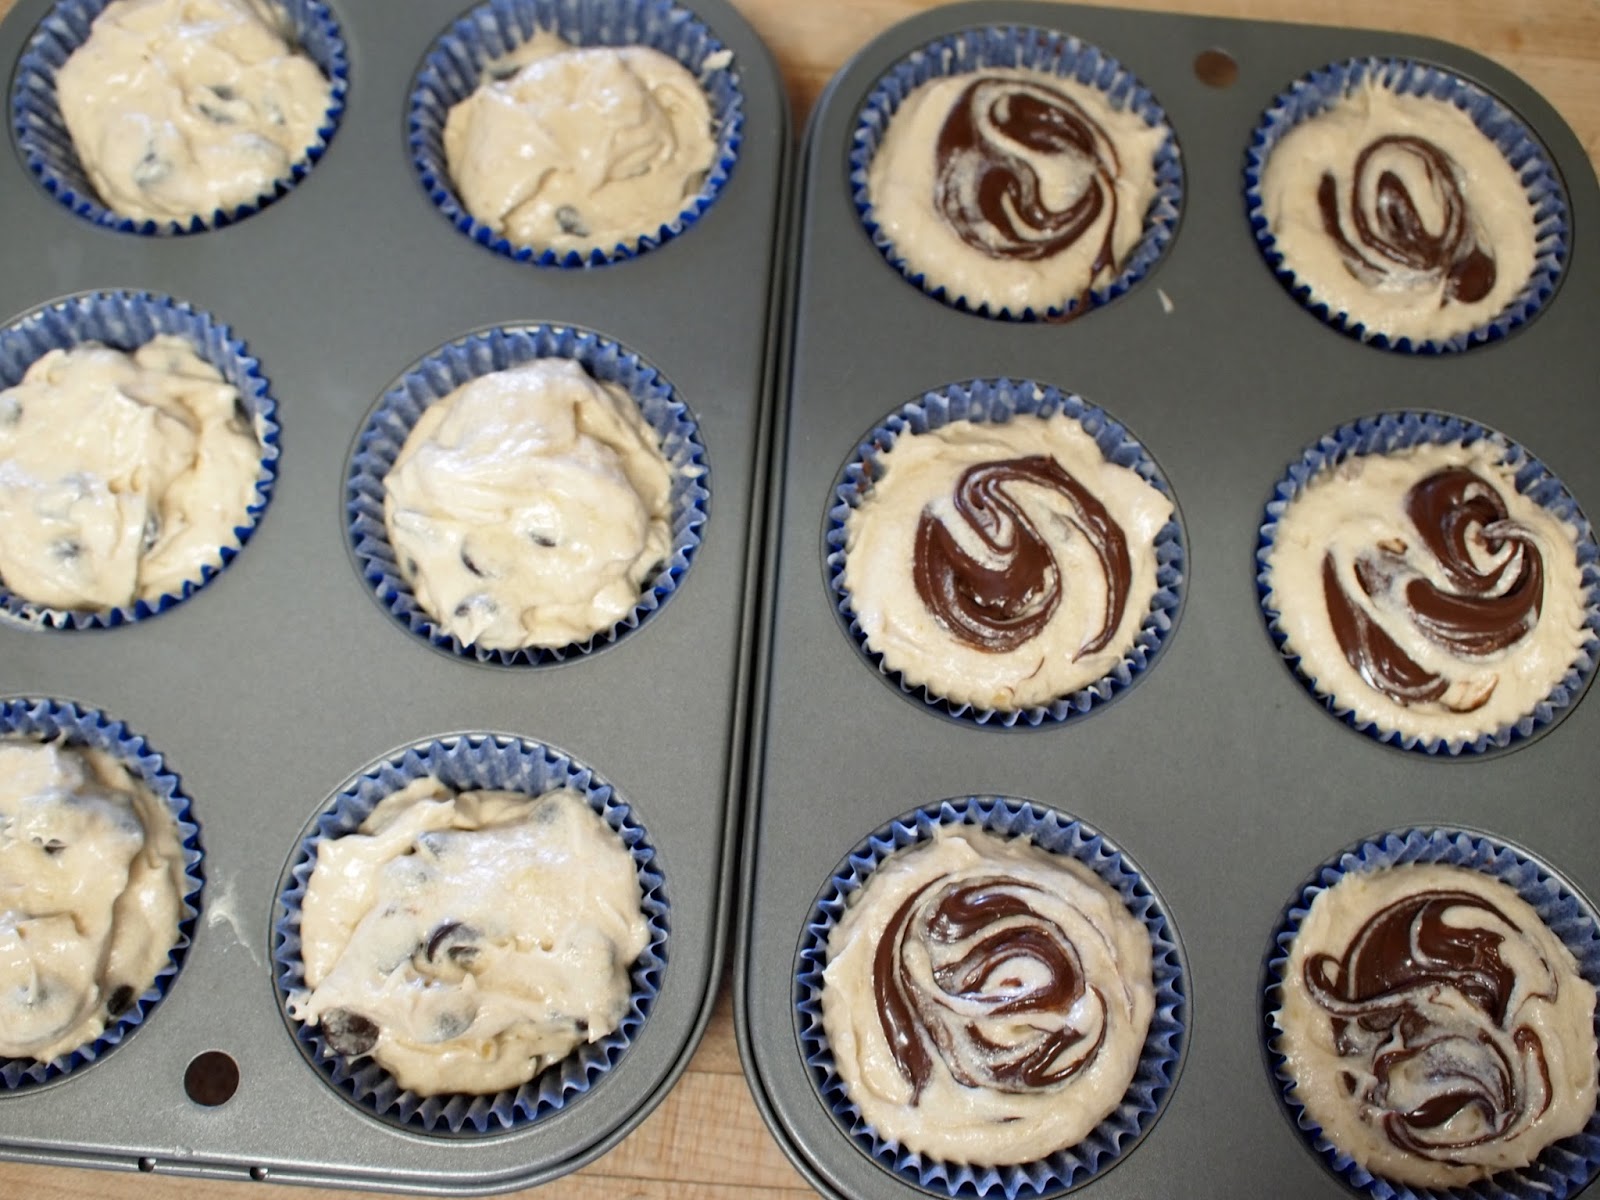
Then I filled the cup up and added a drop of (unfrozen) Nutella to the top.


Then I gave the tops a quick swirl and they were ready to pop in the oven. As you may notice, only half of cupcakes got the Nutella topping. I was running low on Nutella, so I made six like this, then threw some chocolate chips into the batter and did the rest as just banana chocolate chip muffins - also delicious.


I think they looked quite cute once they were baked.


With Nutella in the middle and on the top, you are almost guaranteed a nice Nutella taste in every bite - yum yum!